Wednesday, July 31, 2019

Tomatoes for Days


This year's tomato harvest has been one for the books. We've canned a variety of different tomato based items including tomato sauce, spaghetti sauce, and salsa. Even with all that we've canned, which is pushing 200 jars, we've still not met our goals for the year. Sadly, there's just only so many hours in each day and we are plum tuckered out! 


Mashing tomatoes with mama's monster masher is a prize job for many of my little ones. When I am making tomato sauce or spaghetti sauce, I do not peal my tomatoes. I simply quarter my ripe tomatoes and throw them in a large pot. As the tomatoes cook down we mash them to help speed up the process.


I use my stick blender for EVERYTHING! It is truly one of the best investments I've ever made for our homesteading and homemaking adventures. Once the tomatoes are cooked down enough (usually about an hour of cooking down and mashing) We bring out my stick blender and puree the tomatoes. All of the skins do not get pulverized, but enough of them do that it doesn't bother us. If you really wanted to, you could strain them to remove the few little peelings left behind.


When it comes to deciding what to can and when to can, I always start off with tomato sauce because I can use that in more meals than anything else. I typically fill up about 50 pint jars for pizza sauce (and no I do not can pizza sauce, it's just way to easy to whip up when needed that I spend my summer canning season devoted to other canning needs). After I have my pint jars filled then I move on to quart jars of tomato sauce. The quart jars of tomato sauce is used in soups and stews, which we eat a lot of since they can fill a large family on a strict budget! After I've got my desired amount of tomato sauce in quart jars, I move on to spaghetti sauce or salsa. That changes every year, It depends on which one we've used the most of throughout the past year.


I love my big stainless steel stock pots. They have paid for themselves over and over again. I didn't even spend a whole lot for them. The first one I found on clearance at Target many moons ago for $40, and the other one I found on Amazon for around $35. I did not invest in any high dollar stockpots because these work just as fine. 


This year we've had quite a few jars to bust throughout the canning process. Of course this is heart breaking after you've worked so hard to get the produce to that point, but it is just part of the process. I feel like we've had an abnormal amount of jars to bust because we moved the jars 4 times in 12 months (insert groan and eye roll). It seems we continue to be 'bit in the bottom' over buying that money pit of a house. But, I'm trying to stay focused on looking at the bright side and just be thankful we have the jars to can and the produce to put in them ~ BUT most importantly we no longer live in that house! 

All of these pictures were taken at different times throughout the summer gardening season. I love to watch our larder fill up and to see our hard work from beginning to end, it really helps to fuel me on to the finish line. 

As I shared in my last post, we have had to quit picking the bulk of the garden and have given so much away. I'm trying not to feel guilty over this, but it's super hard. Admitting you're NOT super woman is hard, lol. Even though we're scheduled to begin our homeschool year on August the 5th, I am hoping to get in a few more canning sessions. Lord willing I will be able to process the 30 pumpkins littering my storage room, a batch of mild salsa, a batch of tomato sauce, and a large batch of applesauce. I keep trying to remind myself that there is a light at the end of the tunnel and we CAN do this! 

I can do all things through Christ who strengthens me. 

Philippians 4:13 (NKJV)

With Love & Hope,
Jennifer

Monday, July 29, 2019

Canning Hot Peppers

preserving hot peppers

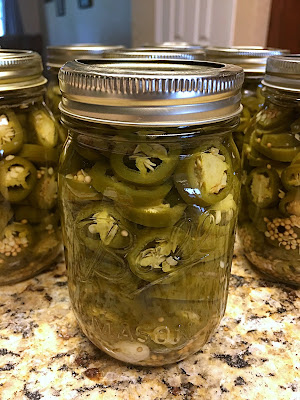
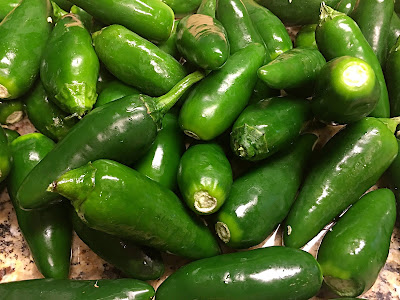
We are a family who LOVES hot and spicy foods. All the way from the youngest to the oldest, there's not one person in our large family that is anti spicy foods. Since we love our spicy food so much we grow a lot of hot peppers. We typically eat them fresh in our food or add them to canning recipes. But, mostly we dehydrate the hot peppers to make crushed hot pepper to add to our meals as a condiments. Sometimes we do like to add pickled hot peppers to our meals too, so we always make sure to have enough pickled hot peppers stashed for the year.

preserving hot peppers

 While we grow several different types of hot peppers, our favorite to pickle is jalapeรฑo. Make sure if you're handling hot peppers that you wear gloves of some sort, because your hands will harbor the hot peppers and anything or anyone you touch will be lit on fire. (The hot pepper oil does not immediately wash off.) Trust me on this one y'all! I can't tell you how many times I've scratched my eye after cutting hot peppers without having gloves on ~ PAINFUL folks, absolutely painful!

preserving hot peppers

Due to the decent amount of rain and sunshine we've had this summer, our hot peppers plants have produced quite an abundant amount of large, HOT peppers this year. We aren't complaining at all, but we have had to give buckets away because we just couldn't keep up.

Preserving hot peppers

Canning Hot Peppers

Ingredients:
  • hot peppers, sliced
  • per jar: 1/2 tsp mustard seed, 6 peppercorns, 1 clove of garlic
  • Brine: 8 1/2 cups water, 2 1/4 cups white vinegar, 1/2 cup salt
Directions:

Fill jars with ingredients. Pack tightly with peppers. Fill with boiling brine leaving 1/2 inch head space. Wipe jar, add lid and rim. Fill water bath canner about half full with water and bring to a boil. Add jars to canner making sure water only comes to the neck of the jars. Bring water to just before a boil (about 15 minutes). Remove jars from canner and invert, set on a towel, cover with a towel and let cool over night. Pickled hot peppers are ready to use immediately. 

We eat pretty plain meals, so adding a little kick to them helps bring out the flavors and make them a tad bit more appealing. Eating on a strict budget and from the garden doesn't have to be completely bland. Adding a touch of hot peppers or other herbs and spices can really make a budget meal into something special. 

Growing your own food and preserving it all is certainly a labor of love. There are days when I just don't think I can do it anymore much less do I really want to, but we keep on keeping on. This years summer garden is wrapping up, and we're definitely ready to move into the next season. But, it will be such a huge blessing to have all this wonderful food during the winter months, especially our pickled hot peppers.

With Love & Hope,
Jennifer

Friday, July 26, 2019

Easy Strawberry Syrup


strawberry syrup recipe

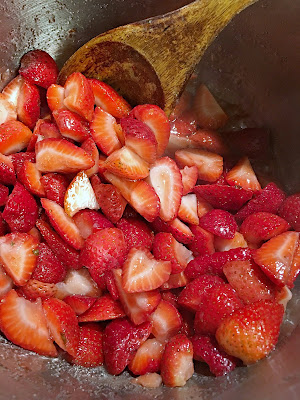
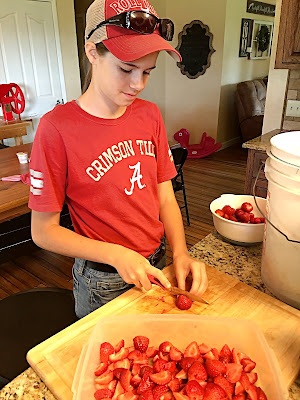
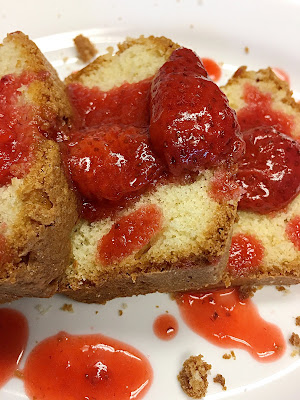
A couple of weeks ago I shared my pound cake recipe and said I would post my easy strawberry syrup recipe soon; well here it is! When it comes to homemade pound cake, homemade strawberry syrup just seems to be the perfect combination. Of course either one could be eaten on their own or with other additions, but our family prefers these particular sweet treats combined. 

strawberry syrup recipe

I am not a huge fan of complicated recipes that may or may not turn out. I just do not have time for all that. When I bake or cook I simply want minimal affordable ingredients and to know the recipe is going to turn out. And with this strawberry syrup recipe you get just that!

Easy Strawberry Syrup Recipe

Ingredients 
  • 1 pound fresh strawberries, washed, cored, and sliced (unless you're baking for a crowd like I do, then you may want to double or triple the recipe)
  • 1/4 cup white sugar
  • 1 tsp vanilla
Directions

Combine all ingredients in a small pot and simmer for 20 minutes. Eat hot over your favorite baked good or cool in fridge and then serve over your favorite baked good. ๐Ÿ˜

strawberry syrup recipe

Super simple folks. I wouldn't lead you astray. Everyone just wants good food as quick and easy as possible ~ or at least that's my baking and cooking goals. We typically aim for eating healthier desserts, but every once in a while it's fun to indulge in the real deal. 

strawberry syrup recipe

It's no secret, food is one of my top love languages. I love to bake and cook delicious food for my favorite people. And when it looks AND taste as good as this strawberry syrup recipe, it makes me want to continue finding and creating tasty recipes to make for my family. For me personally nothing says family more than folks sitting in the kitchen around a big table enjoying good food and sweet fellowship. 

With Love & Hope,
Jennifer

Thursday, July 25, 2019

Easy Kosher Dill Pickles


No summer canning season is complete without at least one batch of cucumber pickling. Now, my fav is a nice and crunchy Kosher dill pickle, and boy do I have a recipe for y'all today. Seriously, it doesn't get any better than this one, and I have tried my fair share. After all, everyone needs a decent dill pickle canning recipe. Look no further folks because I've got your back with this one!

Canning Dill pickles

This particular dill pickle canning recipe will work for whole canning pickles, spears, and sliced; but if you're going to do the spears and sliced route I would eat them fairly quickly. It's not that they lose their flavor, it's just after too long they seem to lose their crunchiness and to me that just makes a bad pickle. 

canning dill pickles

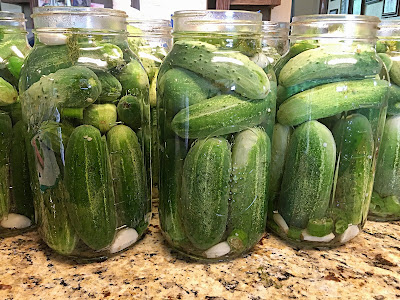
To me, the best way to use this dill pickle canning recipe is to use baby pickling cucumbers stuffed as tight as you can get them in a half gallon canning jar. YES! 'they' sell half gallon canning jars. I'm slow to the game as usual and I spent years canning before I found half gallon canning jars at the store. I supposed I could have looked online, but then I would have had to know I was looking for them and I didn't even know how awesome they were until I saw them up close and personal! But they're worth every penny when it comes to canning Kosher Dill Pickles for sure!

canning dill pickles

I like canning dill pickles for many reason; mostly because they taste awesome, but also because they're super quick and easy to get canned. When the garden really gets to hopping it can be mighty difficult to stay on top of the preserving, so I get a little excited when something comes in that I can preserve all 'lickety split' like ๐Ÿ˜

canning dill pickles

I have two pressure canners that double as water bath canners, but these half gallon jars require a much larger canner, so I keep on hand my speckled blue enamel water bath canner. In all my years of canning I've only had to purchase two. And if I was being totally honest the first one only bit the dust because I used and abused it to no end ~ poor thang! LOL  

canning dill pickles

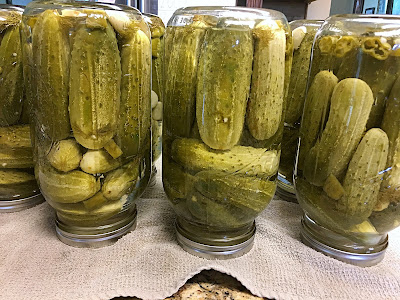
I know it seems strange to most, but anything I water bath can gets inverted to insure proper sealing of my lids. It's just a product of being trained in the art of canning by an 'old timer', I guess. 

Easy Kosher Dill Pickles

Ingredients 
  • Fresh or dried dill
  • cucumbers, washed and dried
  • cloves of garlic
  • hot peppers, optional (have I mentioned we love hot and spicy foods?)
  • Brine: Boil 8 1/2 cups water. 2 1/4 cups white vinegar, and 1/2 cup pickling salt
Directions

Place two garlic cloves, chopped hot peppers and a pinch of dill in the bottom of sterilized jars. Tightly pack cucumbers into jars then top with brine, leaving 1/2 inch head space. Add lid and rim. Fill water bath canner about half full and bring to a boil. Add jars making sure water is just to the neck of the jars. Bring water to just before a boil (about 15 minutes). remove jars from canner, invert, and set a towel over jars and let cool over night. Pickles are ready to eat immediately.

We haven't really had a decent crop of cucumbers in a couple of years so dill pickles haven't been on the canning list. I was super excited to get a couple batches canned this year. While they will hardly last us through the winter, we will certainly savor every single pickle; even if they are rationed to the highest degree, lol. 

Another crop and another harvest, we're really filling the larder this year and I am forever grateful. Even with all the hard work and downright exhaustion at this point, I'm happy to be able to do what we do. To know where our food comes from and to buffer our grocery budget just a tad. There are so many lessons to learn and teaching moments for our children when it comes to growing, cooking and preserving your own food. I'm truly blessed to be able to share this journey with my children. ๐Ÿ˜Š

With Love & Hope,
Jennifer

Wednesday, July 24, 2019

Salsa Canning Day

easy salsa recipe

Well, it's that time of year again! Time to make up some salsa so we can savor the fresh taste of summer throughout the winter months. There's nothing quite like opening a fresh home-canned jar of salsa in the off-season to bring back the joys of fresh garden produce from the summer. Even though it's a ton of work to can salsa, it's a must on my canning list because we are a family that LOVES our salsa and chips ~ Oh and the hotter the better!

easy canned salsa recipe

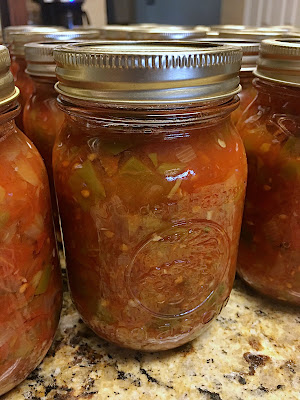
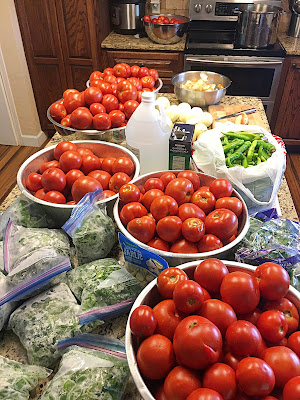
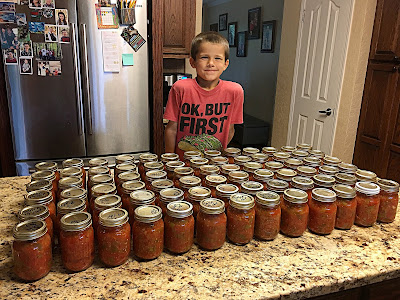
This year we kind of got in over our heads on accident, lol. Sometimes the harvest is so great that you have no other option accept to roll with it. So, this year with our bumper crop of tomatoes AND bell peppers we managed to put up 78 jars of salsa. Wow! I can't believe we did all that in one day, but we did, and it was a massive labor of love. Even if I did get the salsa just a tad bit too hot, lol.

easy canned salsa recipe

This mega batch of salsa was an authentic batch of salsa complete with peeled tomatoes ~ which takes FOREVER y'all. Hence the all-day canning session and massive exhaustion the next day. But, when the harvest comes in you got to do what you got to do and now we will have an abundance of salsa to enjoy all winter long. Absolutely worth it, if you ask me. Now if only the tomatoes could slow down just a tad.

easy canned salsa recipe

Looks like Christmas but tastes like summer. My favorite holiday and my favorite season all rolled up into one festive canning delight. 

easy canned salsa recipe

I think salsa is so pretty. 

easy canned salsa recipe

Look at all those pretty jars. I can't believe we did all that!

I debated on trying a new recipe this year, but decided against it and stuck with my tried and true recipe. I'm just kind of particular about my salsa and sorry y'all but salsa should NEVER have tomato paste or sugar in it ~ in my opinion, of course. But, I get it, just like everything else in this world, everyone has their preferences, and far be it for me to discredit any of them. I just know what we like and I concluded it was best not to mess with a classic family fav.

I'll go ahead and share our recipe just in case someone might be looking for one void of sugar and tomato paste. But, it's nothing fancy just a basic combinations of tomatoes, onions and bell pepper mixed with some apple cider vinegar and herbs. I find that simple and basic are my typical favorites in life. No sense in over thinking a recipe and making things unnecessarily complicated or harder to make. Go with authentic, natural ingredients and you will seldom fail. 

Zesty Salsa

Ingredients
  • 10 cups chopped cored and peeled tomatoes
  • 5 cups chopped green bell pepper
  • 5 cups chopped onions
  • 1 cup chopped hot peppers (I used 2 cups which made it way too hot for most folks)
  • 1 1/4 cup apple cider vinegar
  • 3 cloves minced fresh garlic
  • 2 tbsp finely chopped cilantro
  • 1 tbsp salt
Directions

  • Combine all ingredients in large stock pot. 
  • Bring to a boil, reduce heat and simmer 10 minutes.
  • Ladle into prepared pint jars
  • Wipe clean, place lid and rim on jars
  • Place jars in canners
  • Process in a water bath canner for 15 minutes
  • Remove lid canner and wait 5 minutes
  • Remove jars from canner and let cool
Even though we've canned so many jars of salsa already, I'm thinking since they're so hot I'm going to do up another batch of a milder salsa. That way we can use it in more recipes and our little bitty ones can eat it. Might as well make the most of our surplus of tomatoes these days for who knows what next year may look like. While I'm beyond exhausted from the harvest of this gardening season ~ who knew we'd end up with nearly a bumper crop of everything ~ I'm super grateful for the bounty the Lord has blessed us with. And as long as it keeps coming in, I reckon I'll keep putting it up. ๐Ÿ˜Š 

With Love & Hope,
Jennifer

Tuesday, July 23, 2019

Modern Mommy Minimalist

how busy moms can get rid of the clutter

We all make choices each day: who we will spend our time with, where we will spend our days, and what we'll spend our days doing. We only get one chance each day to make it count. We can either spend it with the people we love doing the things God has called us to, or we can choose the opposite direction. Much of the time we feel we have no choice, but to choose the latter; I can assure you there is another option available.

Money is often used as an excuse to prevent us from doing what we want. But, what exactly is money used for- mostly to buy things. Believe it or not there are many folks choosing to purposefully live an alternate lifestyle. One that does not include excessive amounts of possessions, where minimal amount of money is actually needed. These visionaries are reducing their earthly possessions and replacing them with memory making opportunities. A gift that truly has no value.

In reality we really only need a minimal amount of things to thrive this side of heaven. Even babies and children can do without the excessiveness we've convinced ourselves they need. As modern day mommies our roll still includes managing our homes. But, at the same time it should be our intentions to streamline our home management requirements in exchange for more time doing the things we want with the ones we love.

To best facilitate this change of focus each mommy should transition into a Modern Mommy Minimalist. The process to becoming a Modern Mommy Minimalist can truly be simple and effortless with the following tips.
  1. Pray and ask God to give you discernment as to what things are essential in your home whether you already own them or if they are a future purchase. Never buy on impulse, shop with a list and only purchase those items on the list.
  2. Be in a constant state of purging. I tackle one room a month, in a continuous cycle of ridding our home of things which are broken, worn out, not used, as well as reducing any items which are multiples.
  3. Avoid sales and couponing unless it is for items you purchase regularly or plan to buy in the future. Many folks find themselves in the trap of sales and coupons to the extent that they accumulate things which they do not use or need.
  4. Limit the amount of household necessities you purchase. These items may include: towels, dishes, bakeware, cleaning supplies, toiletries, food, and even personal clothing and shoes. Yes, we need these things, but how much is actually essential for a healthy lifestyle where our personal belongings do not consume us?
  5. Stop comparing yourselves and your family to the 'Jones''. Our wants in this life should never be compared to others. If you desire to spend more time BEING with your family instead of working outside the home or simply managing your home; then it's times to reduce those 'things' which distract you from accomplishing your goals. But first you must recognize that your life, most likely, will not resemble your neighbors, friends, or the majority of society.
The pursuit of being a Modern Mommy Minimalist is a continuous process. It is one that actually lasts a lifetime. No one ever says on their death bed they wished they'd spent less time with their family or less time experiencing the beautiful creation God gave us. Most people would love a second chance to do life over with the intentions to live more, but most of all LOVE more.

Love is a verb, it's something we do for others, but more importantly what we do WITH others. Yes, our homes must be maintained and we have to make money to pay for the essentials, but we can minimize our monetary needs by reducing the clutter in our lives. These 5 simple steps may seem too easy, but they are a critical launching point to the freedom of pursuing the life you always desired. A life that includes more memories and less distractions.

With Love & Hope,
Jennifer

Monday, July 22, 2019

Social Media & the Modern Mommy

social media pitfalls

I've often had a love/hate relationship with social media. I mean the name doesn't exactly denote something we should spend an exorbitant amount of time frequenting. But at the same time most people can't seem to live without it. The majority of people have at least one social media account, if not more. As with all things I do think it can be a positive addition to our lives if used in moderation and appropriately.

Let me back up and give y'all a little background of our personal family dynamics. Our family chooses to live a simple life, one that doesn't include many extracurricular activities such as sports and other nonacademic lessons like dance or music. We purpose to save our money to pursue other family activities such as traveling and 'adventuring' through God's creation. Our church only meets once a week. Homeschool co-ops aren't something we choose to participate in either nor do we do many play-dates. (We do visit with friends, it's just usually a family event after church on Sundays.) This lifestyle has meant many days at home with little to no interaction with folks outside of our immediate family.

Now, I'm not complaining; I love our nontraditional lifestyle, but it can be very isolating at times. This is where social media has been a true God-send for me. While my family is my ultimate focus, I do desire love, support, and encouragement from like-minded ladies. I have found social media to fill that niche and then some. I have made some amazing friends and know if we met in person it would be a joyous occasion of kindred spirits reuniting. It is a wonderful blessing to be able to communicate with my online friends (that may be states away) without leaving my home. During my struggles and triumphs they are simply a direct message away from giving me the little bit of encouragement I need to make it through a difficult day or rejoicing in one of my victories.

Women need other women to help navigate this crazy journey we are on as mothers. We need to know we are not alone in our struggles. We need to celebrate our victories with those who can truly appreciate what we are going through. But finding that consistent support can be difficult when our lives revolve around our family's. Social media can help to fill that void so long as we remember some critical guidelines in using social media.
  • Treat people the way you want to be treated even when you can't physically see the other person.
  • Read everything with 'a grain of salt'. What others share may not be the gospel truth or applicable to you and your family.
  • Don't compare yourself to others. Glean from your 'friends', but don't allow them to make you feel inferior.
  • Keep it real. Share the highlights of your life, the good and the not so good. Remember others are gleaning from your insights too. People want to know the real you.
  • Keep Christ first. God should be in all that we do, even our interactions on social media.
Much of life is about finding balance in all that we do. We need to effectively balance our interaction with others whether that is via social media or in real life. Spending too much time away from our God-given responsibilities through social media or any other outlet is not healthy or pleasing to the Lord. But, we can choose to use all of our resources, including social media, as blessings to help us best fulfill our roles as women, wives, and mothers.

With Love & Hope,
Jennifer

Friday, July 19, 2019

Easy Baked Oatmeal

baked oatmeal recipe

Feeding my family the most nutrient dense, affordable, and tastiest foods available is my goal, but it's not always an easy goal to achieve. It's all about balance as with all things in life. In a perfect world my family would only eat organic, whole foods minus any refined flours, sugars, and processed food; but that isn't practical for our large crew and financial situation. So, I try to do the next best thing ~ cooking from scratch with as many wholesome ingredients as possible including the bare minimum of the 'bad stuff'.  One of my go-to breakfast recipes is baked oatmeal in a variety of different flavors. 

For years I made my little ones eat stove-top oatmeal, but they hated it and I just got tired of the complaints  (I choose my battles, folks). I think it's more of a texture thing than a taste issue, because I've tried every version out there and they still don't like it! So, for whatever reason they have never liked it, which is why I've created multiple baked oatmeal recipes, because they will happily eat the alternate version. Go figure!

While I have several baked oatmeal recipes, this one is my favorite. Mostly because the ingredients are readily available and it goes together super quick. Yes, it does have brown sugar in it, but at least there's no other junk mixed in with it. It's hearty and the kids don't complain when I prepare this oatmeal variation. The leftovers even serve up well reheated ~ what's not to love.

baked oatmeal recipe

Easy Baked Oatmeal

Ingredients
  • 3 eggs
  • 3/4 cup brown sugar
  • 2 1/2 tsp baking powder
  • 1 1/2 tsp cinnamon
  • 2 tsp vanilla
  • 1/2 tsp salt
  • 1 3/4 cup milk + 2 tbsp milk
  • 6 tbsp melted butter
  • 5 cups old fashion oats
Directions

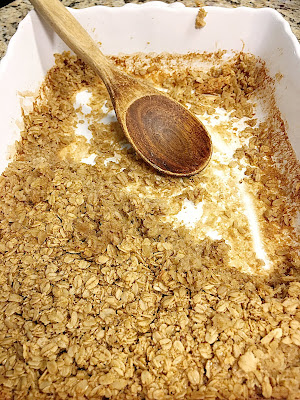
Mix all ingredients together and pour into a greased 9x13 baking pan (I prefer a glass baking dish). Bake 30 minutes @ 350*.

baked oatmeal recipe

And that's about it, nothing overly complicated to get a decent, affordable meal on the table to help kickstart you and your kiddos day.

baked oatmeal recipe

Any leftovers we put int a container in the fridge and reheat for lunch leftovers.

I am not a big fan of condoning whining and complaining over food, but I do prefer to keep my wild crew as happy as possible when it comes to what they eat. Our diet it predominately healthy and my children rarely complain, which is why I am happy to oblige with a little bit of flexibility to find foods and recipes that everyone can enjoy and appreciate. And of course when the recipes coincide with our budget that's an awesome bonus! Affordable and edible, that's an extra little blessing for sure!

With Love & Hope,
Jennifer

Thursday, July 18, 2019

A Busy Mom's Guide to Meal Prepping

Once a week cooking

When you're in the throws of motherhood, eating a healthy balanced diet is crucial. Nutrition is the ultimate key to maintaining your strength and energy for managing the many demands of being a mom. It's not always conducive to eat what the rest of the family eats. Which is why I have found meal prepping my food each week to be a major blessing.

When the Lord opened my eyes as to how to eat healthy, our entire family started eating clean, whole foods. But, unfortunately, a couple years into our family's healthy eating journey we realized it just wasn't working. After much debate and prayer we decided to go back to semi-healthy homemade meals for the rest of the family. And so began my weekly meal prep journey, because I still desired to maintain my clean-eating diet.

Through much trial and error I have fine-tuned my weekly food prep to where it seamlessly fits into my busy schedule. With the many demands of motherhood, weekly food prep can pose it's challenges. But, with this simple A Busy Mom's Guide to Meal Prepping any mom can keep their nutritional intake a top priority. The following list is the exact steps I use to quickly and effectively meal prep each week.
  1. Make sure you have enough containers to store your meals. I use reusable ziplock plastic containers. For $40, I purchased 21 rectangle 'plates' and 8 plastic bowls. I have used them consistently for 3 years, but I do not wash them in the dishwasher. I use baggies for some side items and any snacks. (the small snack containers just didn't work for me.)
  2. Set aside some time each week to plan your weekly meals. I typically keep a 4 week rotation. I eat the same breakfast, lunch, and dinner each day for 5-6 days. I allot one day for eating any leftovers or for eating out. The next week I rotate to another weekly meal plan.
  3. Make a list of the foods you'll need for each meal and purchase those items preferable the day before you plan to meal prep. Purchase in bulk as much as possible
  4. Plan for 1-2 hours once a week to do your actual meal prep. I like to prepare my meats the day/night before my meal prep day in my crockpot or Instant Pot pressure cooker.
  5. On meal prep day, utilize all your resources, i.e. crockpot, electric pressure cooker, oven, etc. I do my best to orchestrate my meal prep day in such a way that all my 'fairy maids' are working while I am. The more ways you can find to multitask the quicker the process becomes.
  6. Chop and prep as much of your produce as possible so that your meals are as 'take-and-go' as possible. For instance I pre-cut my apples (dip in lemon juice to keep them from turning brown) and put in baggies, and I also pre-measure and put into baggies my raw veggies.
  7. Involve your children in the process. Teach them the fine art of preparing healthy foods. Even young children can measure produce and place in baggies, while the older ones can chop fruits and veggies. Make it a family memory making event.
  8. Package your food and label your containers or baggies. There are nifty dry erase labels these days which makes the process of identifying your meals super easy.
  9. Sort your fridge/freezer so that your meals are easily available and ready to grab when you need them. Purpose to plan for some of your meals to be freezer friendly so that you can make the most of your meal prep day since some foods simply won't last a week.
  10. Remain focused on the end goal: insuring that you will have nutrient dense meals to help fuel you through your busy week ahead. Remember that purposing to nourish your body with healthy meals will allow YOU to be the best mommy you can be for your precious little treasures.
Meal prepping may seem like a major undertaking, especially with a house full of children, but I find that the effort and time it takes is well worth it. I truly love having my meals already prepped, especially when I am exhausted and don't feel like preparing me an alternate meal from the rest of the family. With my meals already prepared I don't have to compromise my health and fitness goals with eating foods that work against me. Regardless, if you're prepping an entire week's worth of meals, one or two meals, or simply snacks; the tips used in the Busy Mom's Guide to Meal Prepping can easily be applied to make the process super quick and easy.

With Love & Hope,
Jennifer

Wednesday, July 17, 2019

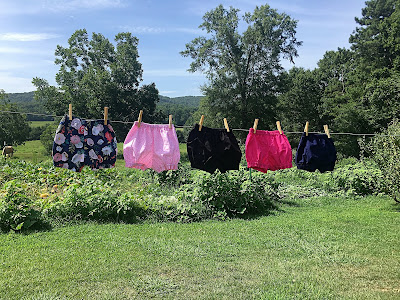
My Favorite Baby Bloomer Pattern


modest clothes for baby girls

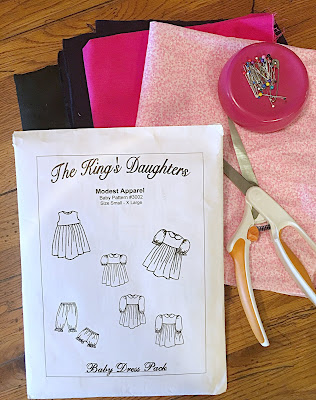
I love to sew and sewing little baby things is so much fun. Even though I love to sew, it's hard to find the time which is why sewing with easy, no-fail patterns is best for me. There's nothing more aggravating than taking the time to buy fabric, cut out a pattern, sew it up and it not fit like the pattern said it would! Sadly, that has happened to me more times than I can count. Which is why I love The King's Daughters pattern. I've sewed countless of garments from them and they turn out ever.single.time.!

modest baby girl clothes

If I had my druthers my girls and I would be wearing dresses full time. But, life isn't always so 'black and white'. But, my youngest daughter and I do wear skirts and dresses the majority of the time. With my baby girl wearing dresses more than she doesn't, I prefer her to wear something under them like bloomers. Now, I'm not opposed to her wearing little knit shorts or leggings, but bloomers seem to be more accommodating for fluffy bottoms.

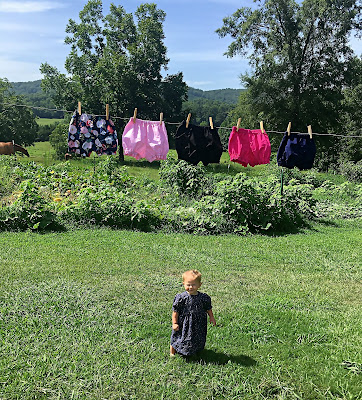
Lydia does not wear cloth diapers 24/7, but she does wear them often. And let's be real, cloth diapers are just a tad bit bulkier than disposable diapers and can make normal sized clothing difficult for little ones to wear. With The King's Daughters Bloomer patterns I never have a problem with them fitting over her cloth diapered bottom.

modest baby girl clothes

My problem with most bloomer patterns is that they're cut like a bikini and not very flattering, much less do they remotely cover my little girl to the extent that I prefer her to be covered. It's all about comfortability and modesty when it comes to sewing for my baby girl. So, if you're looking for a bloomer pattern for babies, I highly recommend the one that comes with The King's Daughter's Baby Dress Pack. They're super easy to sew, modest, and comfortable for baby.


Modest baby girl clothes

Look y'all girls can do anything in a dress, even ride a horse ๐Ÿ˜

Yes, the clothes I think that most represent biblical femininity are typically considered old fashion to the modern eye. But, in these clothes a lady never has to worry about being modest or drawing attention to herself ~ Even little ones can play and have fun while in a modest dress. And further more, I don't know about y'all but shopping for modest girl's and ladies clothing is a nightmare these days! If you happen to find affordable modest clothing, they fall apart after only a few washes. So while sewing may take a little time and planning, it seems to me to be a much better option for most of us who don't have an endless bank account and desire to honor God with what we wear.  

In like manner also, that women adorn themselves in modest apparel, with shamefacedness and sobriety; not with broided hair, or gold, or pearls, or costly array. 1 Timothy 2:9 (KJV)

With Love & Hope,
Jennifer
Tuesday, July 16, 2019

Super-Sized Watermelon

Our family absolutely loves watermelon, but they're kind of pricey bought from the store so I rarely buy them; which is why we try to grow our own. Some years we have an amazing watermelon harvest and others not so much, just like everything else we try to grow. But living in the south we typically harvest at least a few decent watermelons a year. This year we happened to grow our biggest ever watermelon ~ weighing in at a whopping 41 pounds!!

super-sized watermelon

While it wasn't 'dead ripe' as my people like to say, it was the sweetest watermelon we've picked all season. We try to eat oldest to newest in order of when we picked our produce, but everyone was chomping at the bit to dig into this beast of a watermelon. 

super-sized watermelon

I had to get a picture of the huge watermelon on our garden scale just so we had proof of it's size since the pictures don't always do it justice. 

super-sized watermelon

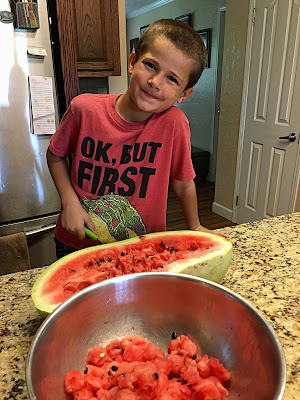
While this isn't the monster watermelon we picked, it is one of our fresh picked watermelons that was  cut at the same time we were scooping out the 'big one'. Scooping out watermelon is a prize job each of my children highly look forward to doing. Which is also why I have 3 melon ballers. Yes, I could just as quickly slice the watermelon myself, but teaching my children to serve and be a positive contributing member to the family and homestead is a huge part of our goals in raising children.

super-sized watermelon

This picture really shows how big our 41-pounder really was. It spanned the length of our island! And an added bonus to our super-sized watermelon was that it had minimal seeds. Picking out seeds for the little ones is not one of my favorite things to do, but I willingly do it because even the littlest ones of our family love watermelon. 

Yes, the bulk of growing your own food is intense work, but when little (big) rewards come rolling in like super-sized watermelons it makes all the work even more worth-while. It's so fun to watch the children's excitement watching the garden grow, picking the harvest, and then enjoying the fruit of our labors. It's a full-circle beautiful gift from the Lord. I'm so grateful for the privilege to be apart of such life-style, even when we're exhausted and ready to throw in the towel ~ we keep plugging away and God continues to honor our efforts even when we are so undeserving. 


"Whatever you do, work heartily, as for the Lord and not for men." 
Colossians 3:23 (ESV)

With Love & Hope,
Jennifer

Monday, July 15, 2019

July Pickings

I can't believe we're already into July! As usual the older I get the faster the years go by. And here we are in the hight of another summer gardening season. We have been mightily blessed this year, especially through our summer garden. The harvest has been a good one and we have much to show for our efforts. We have even been able to bless others with our bounty. We probably have another month of hardcore picking and preserving, but I do see a small glimmer of light at the end of the proverbial tunnel.

It's funny how I rationalize the summer garden ~ I keep telling myself: I just have to get to the next crop harvested. So, looking ahead we've got more tomatoes for tomato sauce, spaghetti sauce, and salsa, more bell peppers, eggplants, and field peas; the okra is just now starting to come in and then we'll have apples in August. The cucumbers, zucchini, and yellow squash are getting wormy so we've slacked in picking them (plus we've picked our fill of cucumbers, lol).

Yes, it's a heavy load, but our family is pulling together to get it all done. One day at a time, one picking at a time, and one preserving method at a time. It won't be long and it will all be finished; another year of harvesting and preserving the main summer garden will be under our belts. Soon the garden will be tilled and prepped for our fall gardens, and we will be able to slow down just a tad. Our fall gardens are much smaller, less work, and more for simply eating fresh home grown produce.

Growing your own food is a never ending cycle of planning, prepping, and toiling but when you see all your hard work before you it makes the whole process so worth while! Here's a few pictures to show y'all what we've been up to these days.

homesteading family

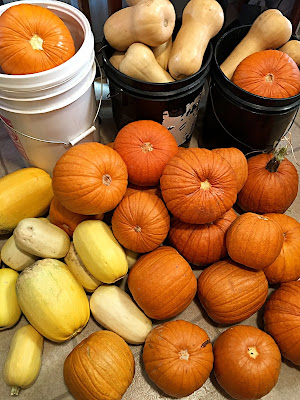
This is what my laundry room/storage room looks like. We are over-flowing with winter squash. Yes, it is early in the year for winter squash, but it just works better for us to plant them earlier in the year. We eat the butternut and spaghetti squash fresh, but I will be canning all the pumpkin soon. 

homesteading family

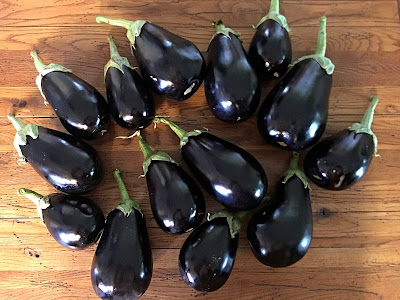
My husband planted six eggplant plants and all of them have thrived, producing tons of eggplants. I breaded and froze 20 one gallon bags of sliced eggplant to fry up later in the year for them to get ruined when one of my kiddos left the freezer door open {{sigh}}. We also had to cook up a bunch of meat that also thawed ~ it was not a fun situation, but we survived and have started over freezing the sliced and battered eggplant, thankfully we are having a bumper crop this year and have the extra eggplant. Trying to stay positive, lol.

homesteading family

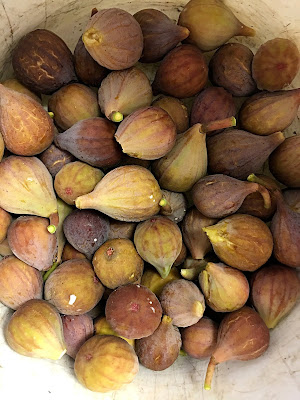
The fig trees have just started producing right as we are wrapping up our blueberry picking. We were blessed to go straight from the blackberry harvest to the blueberries and on to the figs. We'll wrap up with the muscadines in August ~ fruit bearing bushes and trees are the best!

homesteading family

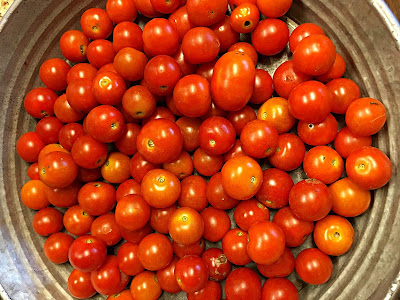
Our cherry tomato plants are currently at peak production. I think this has been our best year ever for cherry tomatoes and my kiddos love to pick them.

homesteading family

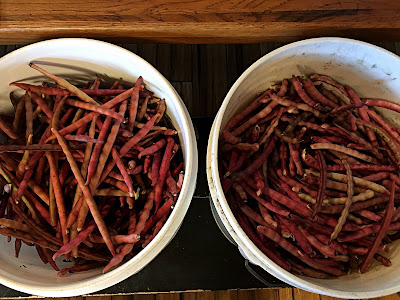
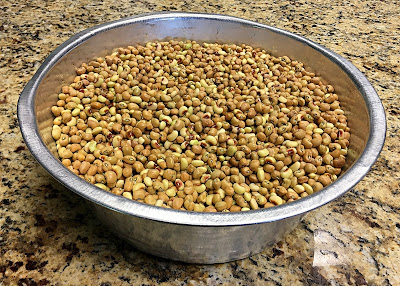
We're picking 5-10 gallons worth of field peas a couple of times a week. 

homesteading family

We're shelling the peas and freezing them until we get some free time to can. Leaving them in freezer bags in the freezer is okay, but we have limited freezer space and I'd rather can the peas to give us more room for freezing other produce that doesn't can well.

homesteading family

We've picked about 20 watermelons so far this year. Including one that was 41 pounds!!!

homesteading family

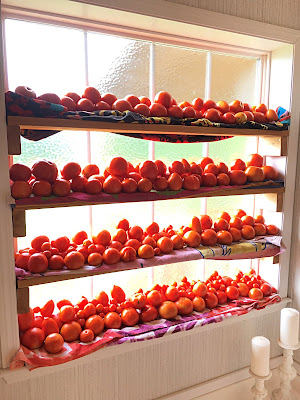
When you live on a bustling homestead, all available space is put to use ~ outside AND inside your home. We put in these mini window shelves in our master bath to hold tomatoes to ripen as well as a place for garden plant starts. It may not be the most attractive space, but it is a most practical space!

And that's a quick look of what we've got producing around our little homestead. I'd show y'all some pictures of our gardens, but they're a mess since right now our focus is harvesting and preserving not weeding. We only have so much time and energy; my husband works a minimum of 60 hours a week and we still have nine children we have to take care of. Keeping your head above water during the peak summer garden season is all about balance, prioritizing and recognizing you can't do it all. And even though we can't do it all, we try our best to be good stewards with all the Lord blesses us with including our garden harvests. ๐Ÿ˜Š

With Love & Hope,
Jennifer
Friday, July 12, 2019

Easy Southern Pound Cake

pound cake recipe

There's nothing better than strawberry shortcake to ring in summer ~ other than, maybe watermelon (for those of who may not know I'm slightly obsessed with watermelon, lol).  This 4th of July I was requested to make homemade pound cake to go along with strawberries & syrup also known as strawberry shortcake. So of course I was happy to oblige since food is seriously my love language. It fills me with great joy to prepare food my family likes and requests!

Now, when I was growing up strawberry shortcake looked a whole lot different than my kids are accustomed too. My people are slightly spoiled and I'm not even sure if they've ever had it the way I ate it as a child. The version of strawberry shortcake I enjoyed was simply those little round store-bought pound cakes with fresh strawberries and if we were lucky, some cool whip. Hey, I'm not complaining, I have fond memories of eating those tasty little dessert cakes and could throw down more than my fair share, but like I said this is NOT the rendition of strawberry shortcake my people know and love.
pound cake recipe

When I get the request for strawberry shortcake it's a little bit more of a labor of love and I'm super okay with that. It begins with a from-scratch pound cake and ends with a sugary cooked strawberry syrup. Since my family can quickly gobble my pound cakes up with or without strawberries, I typically make a double batch and freeze some to enjoy at a later time. Yes, I'm always planning for the next meal, that's the only way to stay ahead of the game with my large crew!

pound cake recipe

This 4th of July dessert baking was spear headed by my oldest daughter, Tabitha. On a side note folks ~ teach your kids to cook, it's absolutely the BEST to be in the kitchen with your kids as they get older. Yes, it may be a pain when they're younger, but it's a parenting effort that has huge positive returns in the future that you will NOT regret!

My favorite recipe for Pound Cake is actually a hand-me-down from my dear friend Denise. When you find a recipe that works you just got to roll with it no matter where it comes from. So I give a special thanks to her because boy has it become a family favorite!

pound cake recipe


Easy Southern Pound Cake

Ingredients

  • 2 sticks of salted butter
  • 3 cups sugar
  • 1 cup sour cream
  • 1/2 tsp baking soda
  • 3 cups all purpose flour
  • 6 large eggs
  • 1 tsp vanilla
Directions 

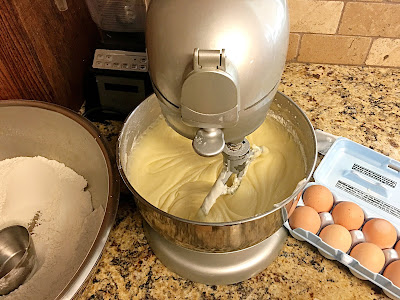
Pre-heat oven to 325* Cream butter and sugar, add sour cream and mix. Sift baking soda and flour, add to the cream mixture, alternating with the eggs. Beat one egg at a time. Add vanilla. Pour the mixture into a greased and floured 10 inch tube pan. Bake 1 hour and 20 minutes or until done.

Notes

I must add a few side notes to how I make these delicious pound cakes. First, I've never actually baked it in the tube pan, I always use my mini pans (which I absolutely LOVE) and regular loaf pans.  When I doubled the recipe for the 4th of July I had enough batter for two regular loaf pans and eight mini loaf pans. I baked them for around an hour. As for the ingredients I use farm fresh eggs and homemade vanilla extract ~ neither of which is necessary. but I do think they add to the yummy flavor of these fabulous little pound cakes. And on a final note, I like to cook mine a little longer so the outside of the cakes are nice and crunchy. Obviously, this is a preference of how you like your pound cakes.

I was quite thankful I had made a double batch of these delicious cakes for our Independence Day celebration because they went FAST! If you're looking for a sweet treat that everyone is sure to love this summer, I highly recommend these pound cakes as they whip up super fast (even if they do take a while to bake) and they happen to be absolutely divine. ๐Ÿ˜‹

With Love & Hope,
Jennifer 
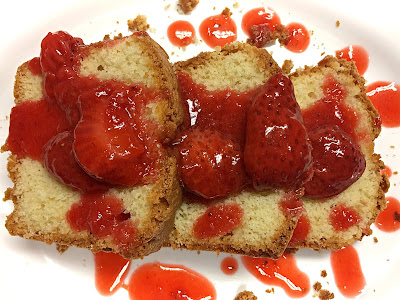
P.S. I'll share my simple strawberry syrup recipe soon. After all it is the best topping for a fresh baked pound cake!