Showing posts with label homestead family. Show all posts

Friday, August 2, 2019

Pea Shelling


Mississippi Pink Eye Purple Hull Peas or as I have affectionately coined them "dirt peas" is the topic of the day here at Country Mama to Many. When living in the south you quickly come to recognize that these little delicacies are a prized favorite for most southerners. It took me many years to acquire a palette for them and I still have to 'doctor' them up a good bit before I can eat them. But, I'm assuming the reason folks like them so much, is that they are super easy to grow down here in the high heat, humidity, and dry soil. 


We've tried growing an assortment of other beans and peas, but we always revert back to these. When you're trying to fill your larder it just makes sense to fill it with the produce you can easily grow. The little ones typically like to pick and shell our peas, and hey, if they find it fun, then why not encourage their interests. After all it's back breaking labor to be hunched over picking 'mile-long' rows of field peas ~ the younger children don't have to bend over quite as far as us grown folks, lol.


Typically my kiddos enjoy watching a movie or a television show while shelling peas. While I'm not a huge fan of television, it makes the useless activity a little more appealing when I know they're being constructive with their time instead of just completely vegging out in front of the T.V. Shelling peas is NOT hard, but when you're picking them by the five gallon buckets, any way to get them shelled as quickly as possible works for me. 


It takes quite a bit of peas to fill a quart jar, which is what I use in meals to feed our family. Since peas have to be pressure canned and they take a little while to process, we fill freezer quart bags with peas and place in the freezer until we have enough to make it worth our time to can them. I do not blanche the peas before freezing. And if we happen to run out of our already canned peas, the frozen peas can be thrown into the crockpot in the morning and turn out just as delicious as if we canned them. But, I do prefer the canned peas which can quickly be thrown into a pot, heated, and ready to serve in just a few minutes. 


 Pressure canning isn't really all that hard, but it is a time consuming process. I know many folks are intimidated by using a pressure canner, but we've never had any problems other than a busted jar here or there. I have two pressure canners and have had to replace two throughout my 15 (plus) years of canning. I've never spent a whole lot on canners, just bought the cheapie Presto Pressure Canners (bought my first one at Walmart) and they've worked just fine to meet our needs. Some homesteading purchases are worth investing in the high dollar models while others not so much. Thankfully, we've been able to successfully use our Presto Canners to fill our larder year after year.

I once heard a saying that said "Get what you can and can what you get". Part of homesteading and more importantly growing your own food journey is learning to acquire a taste for the foods that readily grows in your region. It may take some time to get used to them, but trust me you do. Or at least I've made a point to learn to like a plethora of food I never liked before we began this homesteading adventure. I figure if God placed me in this region, gave me a heart for this lifestyle, and the ability to grow/harvest/preserve such food; than I can graciously eat the food He provides. Ultimately, in this life, all things circle back to the Good Lord and trusting Him for our provisions in every aspect of our lives; even in the basic aspect of the food we grow and cannot grow. 

With Love & Hope,
Jennifer

Wednesday, July 31, 2019

Tomatoes for Days


This year's tomato harvest has been one for the books. We've canned a variety of different tomato based items including tomato sauce, spaghetti sauce, and salsa. Even with all that we've canned, which is pushing 200 jars, we've still not met our goals for the year. Sadly, there's just only so many hours in each day and we are plum tuckered out! 


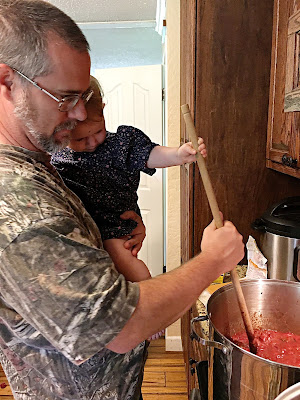
Mashing tomatoes with mama's monster masher is a prize job for many of my little ones. When I am making tomato sauce or spaghetti sauce, I do not peal my tomatoes. I simply quarter my ripe tomatoes and throw them in a large pot. As the tomatoes cook down we mash them to help speed up the process.


I use my stick blender for EVERYTHING! It is truly one of the best investments I've ever made for our homesteading and homemaking adventures. Once the tomatoes are cooked down enough (usually about an hour of cooking down and mashing) We bring out my stick blender and puree the tomatoes. All of the skins do not get pulverized, but enough of them do that it doesn't bother us. If you really wanted to, you could strain them to remove the few little peelings left behind.


When it comes to deciding what to can and when to can, I always start off with tomato sauce because I can use that in more meals than anything else. I typically fill up about 50 pint jars for pizza sauce (and no I do not can pizza sauce, it's just way to easy to whip up when needed that I spend my summer canning season devoted to other canning needs). After I have my pint jars filled then I move on to quart jars of tomato sauce. The quart jars of tomato sauce is used in soups and stews, which we eat a lot of since they can fill a large family on a strict budget! After I've got my desired amount of tomato sauce in quart jars, I move on to spaghetti sauce or salsa. That changes every year, It depends on which one we've used the most of throughout the past year.


I love my big stainless steel stock pots. They have paid for themselves over and over again. I didn't even spend a whole lot for them. The first one I found on clearance at Target many moons ago for $40, and the other one I found on Amazon for around $35. I did not invest in any high dollar stockpots because these work just as fine. 


This year we've had quite a few jars to bust throughout the canning process. Of course this is heart breaking after you've worked so hard to get the produce to that point, but it is just part of the process. I feel like we've had an abnormal amount of jars to bust because we moved the jars 4 times in 12 months (insert groan and eye roll). It seems we continue to be 'bit in the bottom' over buying that money pit of a house. But, I'm trying to stay focused on looking at the bright side and just be thankful we have the jars to can and the produce to put in them ~ BUT most importantly we no longer live in that house! 

All of these pictures were taken at different times throughout the summer gardening season. I love to watch our larder fill up and to see our hard work from beginning to end, it really helps to fuel me on to the finish line. 

As I shared in my last post, we have had to quit picking the bulk of the garden and have given so much away. I'm trying not to feel guilty over this, but it's super hard. Admitting you're NOT super woman is hard, lol. Even though we're scheduled to begin our homeschool year on August the 5th, I am hoping to get in a few more canning sessions. Lord willing I will be able to process the 30 pumpkins littering my storage room, a batch of mild salsa, a batch of tomato sauce, and a large batch of applesauce. I keep trying to remind myself that there is a light at the end of the tunnel and we CAN do this! 

I can do all things through Christ who strengthens me. 

Philippians 4:13 (NKJV)

With Love & Hope,
Jennifer

Monday, July 29, 2019

Canning Hot Peppers

preserving hot peppers

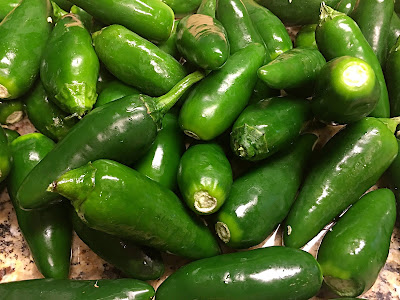
We are a family who LOVES hot and spicy foods. All the way from the youngest to the oldest, there's not one person in our large family that is anti spicy foods. Since we love our spicy food so much we grow a lot of hot peppers. We typically eat them fresh in our food or add them to canning recipes. But, mostly we dehydrate the hot peppers to make crushed hot pepper to add to our meals as a condiments. Sometimes we do like to add pickled hot peppers to our meals too, so we always make sure to have enough pickled hot peppers stashed for the year.

preserving hot peppers

 While we grow several different types of hot peppers, our favorite to pickle is jalapeño. Make sure if you're handling hot peppers that you wear gloves of some sort, because your hands will harbor the hot peppers and anything or anyone you touch will be lit on fire. (The hot pepper oil does not immediately wash off.) Trust me on this one y'all! I can't tell you how many times I've scratched my eye after cutting hot peppers without having gloves on ~ PAINFUL folks, absolutely painful!

preserving hot peppers

Due to the decent amount of rain and sunshine we've had this summer, our hot peppers plants have produced quite an abundant amount of large, HOT peppers this year. We aren't complaining at all, but we have had to give buckets away because we just couldn't keep up.

Preserving hot peppers

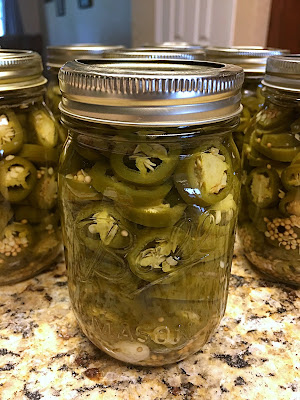
Canning Hot Peppers

Ingredients:
  • hot peppers, sliced
  • per jar: 1/2 tsp mustard seed, 6 peppercorns, 1 clove of garlic
  • Brine: 8 1/2 cups water, 2 1/4 cups white vinegar, 1/2 cup salt
Directions:

Fill jars with ingredients. Pack tightly with peppers. Fill with boiling brine leaving 1/2 inch head space. Wipe jar, add lid and rim. Fill water bath canner about half full with water and bring to a boil. Add jars to canner making sure water only comes to the neck of the jars. Bring water to just before a boil (about 15 minutes). Remove jars from canner and invert, set on a towel, cover with a towel and let cool over night. Pickled hot peppers are ready to use immediately. 

We eat pretty plain meals, so adding a little kick to them helps bring out the flavors and make them a tad bit more appealing. Eating on a strict budget and from the garden doesn't have to be completely bland. Adding a touch of hot peppers or other herbs and spices can really make a budget meal into something special. 

Growing your own food and preserving it all is certainly a labor of love. There are days when I just don't think I can do it anymore much less do I really want to, but we keep on keeping on. This years summer garden is wrapping up, and we're definitely ready to move into the next season. But, it will be such a huge blessing to have all this wonderful food during the winter months, especially our pickled hot peppers.

With Love & Hope,
Jennifer

Tuesday, July 16, 2019

Super-Sized Watermelon

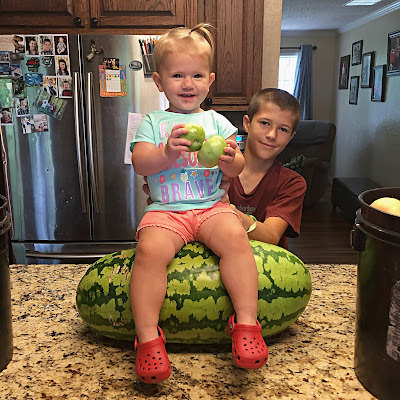
Our family absolutely loves watermelon, but they're kind of pricey bought from the store so I rarely buy them; which is why we try to grow our own. Some years we have an amazing watermelon harvest and others not so much, just like everything else we try to grow. But living in the south we typically harvest at least a few decent watermelons a year. This year we happened to grow our biggest ever watermelon ~ weighing in at a whopping 41 pounds!!

super-sized watermelon

While it wasn't 'dead ripe' as my people like to say, it was the sweetest watermelon we've picked all season. We try to eat oldest to newest in order of when we picked our produce, but everyone was chomping at the bit to dig into this beast of a watermelon. 

super-sized watermelon

I had to get a picture of the huge watermelon on our garden scale just so we had proof of it's size since the pictures don't always do it justice. 

super-sized watermelon

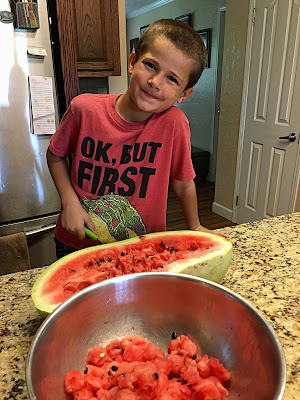
While this isn't the monster watermelon we picked, it is one of our fresh picked watermelons that was  cut at the same time we were scooping out the 'big one'. Scooping out watermelon is a prize job each of my children highly look forward to doing. Which is also why I have 3 melon ballers. Yes, I could just as quickly slice the watermelon myself, but teaching my children to serve and be a positive contributing member to the family and homestead is a huge part of our goals in raising children.

super-sized watermelon

This picture really shows how big our 41-pounder really was. It spanned the length of our island! And an added bonus to our super-sized watermelon was that it had minimal seeds. Picking out seeds for the little ones is not one of my favorite things to do, but I willingly do it because even the littlest ones of our family love watermelon. 

Yes, the bulk of growing your own food is intense work, but when little (big) rewards come rolling in like super-sized watermelons it makes all the work even more worth-while. It's so fun to watch the children's excitement watching the garden grow, picking the harvest, and then enjoying the fruit of our labors. It's a full-circle beautiful gift from the Lord. I'm so grateful for the privilege to be apart of such life-style, even when we're exhausted and ready to throw in the towel ~ we keep plugging away and God continues to honor our efforts even when we are so undeserving. 


"Whatever you do, work heartily, as for the Lord and not for men." 
Colossians 3:23 (ESV)

With Love & Hope,
Jennifer

Wednesday, July 3, 2019

What to Plant Even if You Have a Black Thumb

gardening for beginners

If you're trying to grow you're own food and find yourself struggling ~ take a deep breath because today I've got some suggestions that might just help you to get you're foot in the door and turn your black thumb to green!

My husband happens to come from a family with natural green thumbs. Growing their own food has been a way of life for generations ~ and it never was called 'homesteading' ~ growing their own food was simply how they put food on the table. Now, my husband didn't grow up actively involved in his family's large gardens, but he was around and has inherited an amazing green thumb. Me, I'm from the opposite end of the spectrum, and to say I have a black thumb is putting it mildly. I am getting better at it and over the years I have gleaned some wonderful gardening wisdom from my husband's family of master gardeners.

I've come to realize that no matter how gifted of a farmer one may be, they can't ever outdo the Almighty Good Lord Above. For it is only through God's mercy and grace that anyone can grow anything. Drought, flood, pestilence, frost, and a host of other annoying nuisances can destroy a crop quicker than you can blink an eye. Yes, there are things you can do to help lesson the effects of such gardening attacks, but sometimes your crops are simply doomed to die.

When it comes to learning the art of growing your own food, I highly recommend searching out fellow farmers in your region to find out what grows best. Making friends in the homesteading world is a major blessing and we would not be where we are today if it weren't for the help of those who've traveled this road before us. Learn from them, do not be afraid to ask them sincere questions, most folks like us love to 'chew the fat' over our gardens, lol! We are all in this together and share a passion like none other.

Ok, now on to the ONE crop I believe everyone should have on their homestead because it's nearly fail proof and will yield copious amounts of produce every year with little to no effort. Sounds pretty awesome, huh? The number one plant I believe all homesteaders and even backyard gardeners should have on their property is berry bushes. Yes, I said berry bushes! Now each region is going to have their own berries which grow best, but over the years I've heard numerous amounts of fellow homesteaders having great success with a variety of different berry producing bushes.

In our region it's nearly impossible to kill blackberries. So, we grow blackberries. I'm not kidding y'all when I tell you we pick gallons of blackberries a year and we do nothing to them, but let them grow. We've actually tilled up a blackberry patch to plant something else in that spot and if we weren't diligent to continue tilling that area, they would come back. My parents who live in Ohio and struggle to grow a typical garden have raspberry bushes, and y'all they produce like CRAZY! Now, we can't grow raspberries down in our area ~ we've tried to no avail. So when I say search around and find what grows in your region, do that, and I'm confident your gardening efforts will show vast improvements.

Growing your own food can have tedious learning curves, but I'm a firm believer it is well worth the effort. Most of the times it seems gardening is simply trial and error. Never give up, never lose hope, and keep trying. When one method fails, try another. And to be frank sometimes it's not even your gardening methods, sometimes it just wasn't meant to be for a particular crop to grow. I can't tell you how many crops we've lost over the years. Yes, it can be discouraging, but that's when you have to dig your feet in deeper and keep plugging away. Continue remembering your reasons why ~ You've got this friends!

With Love & Hope,
Jennifer
Tuesday, July 2, 2019

What to Can if You've Never Canned Before

canning for beginners

I hear all the time: "I've never canned before and don't know where to start, any advice?" Well, I've got ya covered today..... here's my advice to all the first-time canners out there. 


Canning is super easy and most folks simply get overwhelmed with the idea of canning, when in reality it's not that complicated. I can remember when I first started out, being scared of all the unknowns which honestly comes natural when learning any new thing. But, sometimes 'throwing caution to the wind and jumping in with both feet' is the best teacher. And that my friends is exactly where I started over a dozen years ago ~ wading threw the confusion of canning with trial and error. Thankfully, it really was pretty straight forward and there was not much error.

canning for beginners
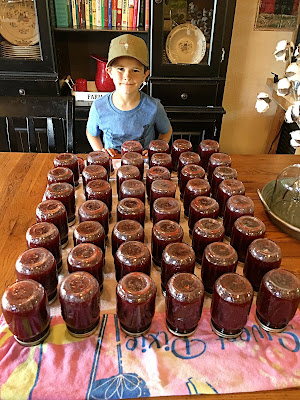
Everyone loves to get in on the jam making fun in our house, even the youngest.💖

Many moons ago when I was anxious to start canning, I talked with a few 'old-timers' and decided to begin my canning adventures with jam. And much to my dismay it was insanely easy, fun, and pretty, PLUS it tasted sooo good! Well, it doesn't get any better than that! Once I got a few batches of jam under my belt, my confidence was boosted and I was ready to move on to canning other foods. YEAH!!

canning for beginners
A dear sweet old lady once advised me to invert my jars to insure a proper seal when canning jams and jellies ~ so that is what I do. Usually it's wise to heed the wisdom of our elders. :)

Since I had such success with my first canning experience, when folks ask me where to begin as a newbie canner, I highly recommend they begin with jam just like I was advised. The nitty gritty of the why narrows down to this: the only way to really mess up a batch of jam is if you don't add enough sugar (ALWAYS add the amount of sugar suggested for the recipe), or you burn it. But, I have made hundreds of jars of jam over the years and have never ruined a batch. Well, there have been a few batches that weren't as firm as I would prefer, but that was purely chef error and I did not use enough sugar. No worries though, when that happens the runny jam makes for a perfect syrup poured over pancakes, waffles, and French toast.

canning for beginners
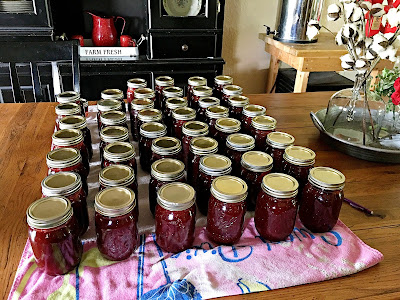
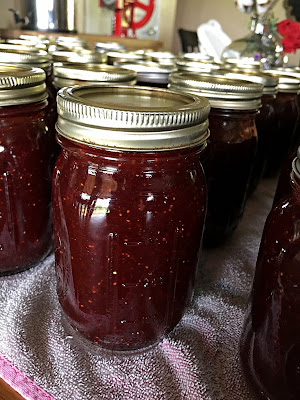
This is our yearly batch of strawberry fig jam. I always follow the directions on the pectin packages.

Yes, jams and jellies are typically high in sugar and may not be on the top of the list of those ultra health conscious folks. But, the way I look at these jars of strawberry fig jam is that they are made with organic fruit and without any preservatives; and the ultimate bonus: they were extremely cheap to make. After all we don't go around eating jars of jam every single day, it's simply a delicious homemade condiment to use on fresh baked goodies like biscuits, bread, and my kids even enjoy fresh canned jam on waffles. 

Canning for beginners
I like to set my hot jars on a beach towel to cool over night and 
then I label and store them in my pantry.

So my advice still remains, if you're just jumping into the wonderful world of canning ~ start with canning fruit jams. Pick up a box of fruit pectin from your local Walmart (or grocer, maybe) and break open the box, they've got the directions on a little slip of paper. I always use their instructions and I've never had any problems when I've followed them exactly. Of course, you will need some basic gear, but none of it is too costly and once you get the hang of jam you'll be using all your new gear for a myriad of new canning adventures. 

Basic Water Bath Canning Gear 

(To Make Jam)
  • Large stock pot
  • Long wooden spoon
  • Silicone Spoonatula
  • Water bath canner (like this one)
  • Pint or half pint canning jars + lids
Trust me y'all, canning jam is fun and YOU can do this! Get your kids involved and they will fall in love with the dying art of preserving food too. Next thing you know they'll be spurring you on to find new foods to can. Or you'll just continue filling your pantry with delicious varieties of fresh canned jam, but don't forget homemade jam makes the perfect gift! Enjoy the journey friends ~ canning is a beautiful tradition of preserving food. Canning truly is a rewarding way to enjoy the fruit of the harvest throughout the year.

With Love & Hope,
Jennifer
Monday, July 1, 2019

Easy Dehydrator Zucchini Chips

dehydrator zucchini chips

This time of year we have oodles of zucchini coming in. And to be honest, as much as I love the yummy green produce, I do eventually have my fill. So, then comes the fun part of trying to find some creative ways to not let our bounty go to waste. One way I like to preserve our crop of zucchini is to dehydrate them into chips. 

Now I must admit, most folks in our family do not care for the zucchini chips, but it's worth the effort to dehydrate them for those of us who do. It really isn't that complicated, it just takes some time. While we do not use our dehydrator as much as I had hoped, I am grateful we have it in times like these. I just hate being wasteful with our God-given harvest and even though I don't mind giving some of it away; ,I'd much prefer to preserve it in such a fashion that we can enjoy it during the off season.

We have the nine tray Excalibur dehydrator. It was one of those many pricy homesteading investments that have been well worth it. I don't really have any experience with any other dehydrator, but I can attest to the fact that the Excalibur is a phenomenal dehydrator and never gives us a bit of trouble. We actually keep it out year round on a table which holds our manual grain mill and Berkey water purifier (two more homesteading investments that I LOVE!). 

When it comes to large scale gardening and homesteading, I'm a firm believer it's hugely important to budget for tools which make the many tasks required easier and more efficient. We have made so many homesteading purchases over the years only to regret it because we didn't jump in with both feet. Going the cheap route does not always pay off!! Thankfully, we did not make that mistake when purchasing our dehydrator, I know we've had it for at least 7 years and it's still going strong with decent amount of use. I'm sure there are other quality dehydrators out there, but the Excalibur is the only one I can officially brag about ~ and they don't give me a dime to say so!

Easy Sea Salt & Garlic Zucchini Chips (Dehydrator version)

Ingredients
  1. Zucchini thinly sliced
  2. Sea Salt
  3. Powdered Garlic
Directions
  1. Place thinly sliced zucchini on dehydrating trays, making sure not to overlap
  2. Sprinkle with sea salt and garlic powder (you may want to do this over a pan to prevent the spices from going every where)
  3. Place dehydrator trays into dehydrator
  4. Set dehydrator to 125 - 155 degrees (It is my experience that every dehydrator is different, but when I am wanting to make 'crispy' dehydrated foods I always use a much hotter setting and on my dehydrator I set it to 150 degrees for these zucchini chips)
  5. Set timer for 12-24 hours (I check mine after 12 hours, but it typically takes 24 to get that crispy texture I prefer for my zucchini chips)
  6. Once chips are your preferred texture store them in glass jars or ziplock bags
During the summer harvest season our dehydrator could easily run around the clock, but for safety concerns (not that we've ever had reasons to be concerned it's just I have an unusually weird fear of fires) we turn it off when we go to bed and just turn it back on when we wake up. We have never had any problems with the food we have been dehydrating by turning the dehydrator off and then back on.  
easy sea salt and garlic zucchini chips

As for tastes and texture, I don't want to fool you that these will be the same as your store-bought potato chips ~ sorry y'all but they won't be. BUT, they will be an awesome tasty healthy alternative for when you get a hankering for something salty. When it comes to homesteading and growing your own food it's all about not wasting and acquiring a palette for foods you may not have otherwise enjoyed. Eating the food God made is about as close as we will get for the way He intended life to be, and nowadays we have awesome methods and tools to make that food unique and tasty. To me these easy sea salt & garlic zucchini chips are the perfect step in the right direction to avoiding overly-processed junk food AND to use up the summer surplus of zucchini.

With Love & Hope,
Jennifer
Friday, June 28, 2019

Dehydrating Dill Without a Dehydrator

growing dill

Growing herbs is another wonderful addition to any homestead. While I would love to grow a whole host of different herbs I really only grow a couple different kinds and even then it's only when I really need them. My time is extremely limited and I have to make sure I'm using it wisely, which is why I don't grow more of a variety of herbs.

One of my favorite herbs to grow is dill. It is super easy to plant, pick, and preserve. Talk about my kind of herb. Seriously y'all, this aromatic savory herb is black thumb proof! It's so easy to get carried away and plant more than you'll need. This year we only planted two little rows of dill and if you scroll the pictures, you can see how much we harvested ~ quite a bit for such a small patch.

growing dill
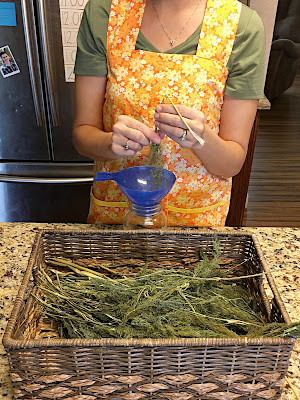
Excuse the crude picture, but this is our storage room/sewing room and it was hard to get a decent picture, but I wanted y'all to see how I hung the bunches. I used push pins to hold them up there.

When it comes to harvesting dill to dehydrate, I simply cut the stems at the base, bunch them into about 1.5 inch diameter bunches (no exact science here, just bunch some stems together), tie yarn or twine around the bunch, knotting tightly and leaving a long tail. Alright here's where we might part ways, lol. Now, I take my bunches of dill and hang them from the ceiling in one of my rooms.

Ok, ok, ok, I know some of ya'll are rolling your eyes and maybe even already left the page; but hear me out. When homesteading everything from your land to the four walls you call your home is fair game to meeting the needs of the homestead. For us, one of those needs includes using our ceiling to hang herbs to dry. It only takes about 2 weeks for them to dry and we do try to use a room that isn't frequented by guest. But honestly, at this point in the game it really wouldn't bother me if folks saw my dill hanging from the ceiling anyways. It would probably be a great conversation starter, lol.

growing dill

After about two weeks your dill should be dry enough to take off the stems and store in jars. To do this, I take each stem, turn it upside down and strip the dried dill off into a jar.

growing dill

I don't worry about sealing my jars or even using those little preserving packets. I've never had a problem with my dill going bad by just keeping them in glass canning jars in a cool dark place. It's that simple, no need to break out the dehydrator to dehydrate dill. And let me tell y'all fresh dehydrated dill makes the best ranch dressing and dip!!

So, what's your favorite herb to grow?

With Love & Hope,
Jennifer

Wednesday, June 26, 2019

Blueberry Picking with the Family


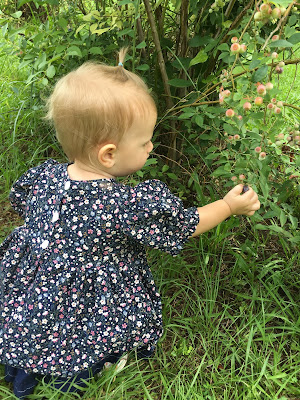
Well, the season for blueberry picking is upon us. Today, me plus eight of my crew went out to see if we could fill a 5 gallon bucket. We were only able to get about a gallon, but we also only had an hour because we had to get back to the house to can some bread and butter pickles and dill pickles. The good thing is when you've got private access to blueberry bushes you can get up early and head to the bushes to pick anytime; so we'll be doing that in the mornings for an hour or so until we've cleaned out the berry bushes.

The berries are nice and plump this year!


Little miss Lydia was picking blueberries like she'd been doing it for years. 


Titus picked a few but mostly he ran around chasing Samuel, lol.


Once Lydia had her fill of picking blueberries we put her in the stroller and Matthew pushed her around. He picked a few berries, but mostly just ate them. Seven is a tough age to balance picking and eating, lol.


Two of my main pickers. Tabitha & Joshua filling their bucket like there was no tomorrow!


Even our big teens get involved in the pickin'. Elijah is a great help and rarely complains about the work around the homestead.


Lucas found himself a good spot to hang out and pick, he was quite ambitious with his own 5 gallon bucket. 😁


And mama of course picking berries. I managed to pick a quarter of a bucket of berries, despite spending an exorbitant amount of time child training a certain 4 year old. {{sigh}}


These three escaped the blueberry 'patch' to find themselves some apples on the apple trees 
(more likely the unripe ones that fell on the ground ~ they'll learn eventually 😅).

We have a good many blueberry bushes on our own property, but these bushes we were picking from are located on our neighbor's property. Over the years we've reached out to people in our area asking if they had fruit producing trees and bushes that we could 'pick on halves'. Picking on halves means several different things but usually it means we pick them some of the fruit in return to pick and keep the rest. This especially works great with those 'senior saints' who planted those wonderful trees and bushes oh so many years ago but aren't able to pick from them any more. We've also enjoyed connecting and building relationship as well as gleaning great wisdom from many of these folks who let us 'pick on halves'. Plus it's an awesome way to fill your larder for nothing but sweat equity. 

My blueberry pickin' crew. 

The pursuit of a simple life has led our family to really think outside the box and get out of our comfort zones. Picking on halves, bartering, simply asking to borrow land and/or tools and equipment; you name it, there's a lengthly list of all the ways we've utilized to simplify our lives and build our homestead. I'm a firm believer that it's a simple life/homesteading frame of mind. All the land and money in the world won't get you back to basics, slowing down and appreciating the blessings you've been given. It's working hard and often doing without that often sparks the greatest ideas and the best inventions. 

So, while it may seem like we're just doing a family fun outing ~ picking blueberries ~ it's really so much more. It's instilling in my children a strong work ethic, it's building relationships, it's teaching them to know where food comes from and how God allows it to grow, it's real life, most importantly it's our life. Yes, it's a little different than most, but it's a great life and one I wouldn't change it for anything.

With Love & Hope,
Jennifer
Wednesday, June 19, 2019

How NOT to Get Overwhelmed with the Harvest


4 gallons of fresh picked bell pepper
This past Monday we found ourselves swimming in produce. Apparently after a couple weeks of some refreshing rain, our summer garden took a massive turn for the better! We had thought that everything was on the verge of dying and sadly we did lose our first big batch of green bean plants to the mini drought. Despite them prematurely dying we are grateful we were able to eat fresh from them several times, even if there was no canning like we had hoped. The corn also took a hit and instead of long, full ears of corn we only got a couple cobs from each stalk and they weren't the best we've ever had. But, that is the life of a homesteader and growing your own food; the outcome is all dependent on the Lord and what He sees fit to give.

It never fails no matter how well you plan your garden and stagger planting your crops; it's inevitable that at some point everything is going to hit in major quantities all at once. This is where you can quickly become overwhelmed!! NO worries, after years of experience I've got a list of steps to help you stay calm so you can quickly and efficiently conquer your awesome garden haul!!

This is what we were looking at Monday evening and I'm not going to lie, I was in a slight panic. But, thankfully I've been here before and after taking a quick assessment we began tackling what needed to be done to make the most of our blessed harvest.


On Monday we picked about 19 dozen EARS of corn. Most of which we left on the cob and put in the freezer. I'll be posting soon how we do this and how easy it really is to preserve corn on the cob! 


Next we had 6 gallons of cucumbers to come in adding to the 4 gallons we already had.


Then we picked 5 gallons of yellow summer squash.


A couple gallons of hot peppers.


Some zucchini & eggplant


A mess of green beans.


And a gallon of field peas or as I affectionately call them 'dirt peas'. 

We had a mighty fine blessing through our gardens to say the least, but now we had to figure out what we were going to do with it all. Here is how I typically handle a bumper garden haul like this:
  1. Determine the produce which you collected the most; that one takes priority, unless it's corn. Corn must be done within 24 hours or it ruins. 
  2. Decide what is going to be canned, frozen, dehydrated, or eaten fresh.
  3. Wash what needs washing.
  4. Put away what you plan to eat fresh in the fridge.
  5. Fill the dehydrator with what you want to dehydrate (In this haul we dehydrated the peppers).
  6. Chop and bag what you want to go in the freezer. (For this picking we skinned the corn, chopped the bell peppers, and shelled the peas all to go in the freezer ~ the peas we will can at a later time, but for now they can go in the freezer until we're ready to can them).
  7. Prep for any canning you plan to do, such as the squash, it can be cut the night before or just simply make sure you have all the supplies you needs for whatever you're canning the next day.
  8. If you got a super bumper crop coming in you can always try to sell some of it ~ we don't typically have good luck with selling, but you can always try.
  9. Go in on halves: this means someone helps you process your produce using whatever method you're using in return to take some of the harvest home with them.
  10. Give it away. After all it's better to give than to receive and I'd rather share our blessings with others than let it go to waste.
** And here's a BONUS TIP **
If you're going to be having a marathon canning day ALWAYS plan for simple meals throughout the day. I highly recommend putting something in the crockpot for dinner. Trust me when I say, you will not want to cook by the time folks are hungry for dinner!

Hopefully this simple guide will help y'all when it comes to dealing with the harvest. I like to remember it's all for just a short season. Maybe two months at the most when you feel like you eat, live, and breath the garden. And then all at once it's done and your larder is full and you can rest; enjoying the fruits of your labors throughout the fall, winter, and spring. And ironically, when the main summer garden rolls around again somehow you forget how much work it is to grow your own food. It's like the joy of enjoying the harvest in the off-season overshadows the reality of the time and effort you have to put into the main summer garden. It's a wonderful mercy from the Lord, that's for sure.  

Thankfully, our Monday harvest has all been taken care of and none of our produce went to waste. We're filling our larder one day at a time and I give all the glory to the Lord for giving us the harvest as well as the wisdom and strength to get it all done.

With Love & Hope,
Jennifer