Tuesday, June 23, 2020

Corn Harvest 2020


Well y'all the first and second harvest of corn for the year 2020 has come in! Whoop whoop! It never fails that the corn and potatoes fall within seven days of each other. No matter how strategically we plan, they always need picking around the same time. Which means, a ton of round-the-clock work for all the members of our family. Thankfully, it's early in the summer garden season and we're still in good form, lol. Come talk to us the end of July and we'll be singing a different tune. 


We have several more rows of corn coming up in stages so Lord willing we should get a decent harvest of corn. Prayerfully, we'll be able to meet our family quota and be able to sell some. 


The crazy thing about corn is you pretty much have to pick, shuck, silk, and preserve it all in the same day. Which is why it takes every one in the family helping out. 


Our first and second harvest of corn yielded over 400 ears. We shared some with neighbors, froze some ears for corn on the cob, and then skinned the rest for canned corn. 


We were super thrilled to get a good harvest of corn, because we were completely out of both canned corn and corn on the cob. Our yearly goal for frozen corn on the cob is 30 bags of ten ears and our goal for canned corn is 50 pints. These goals pretty much allow us to eat corn on the cob nearly once a week for the year and we can add canned corn to meals once a week. I'd love to put 50 bags of corn on the cob in the freezer, but that just isn't so easy when you only have two freezers. Due to limited freezer space we really have to be intentional with what we store in them. No worries though, because any extra is easily sold around these parts.


When it comes to shucking and silking the corn, everyone gathers around under the shade tree and gets to work. We even bring out the super-sized industrial fan to help cool us off. Shucking and silking corn is a great job for children. There's nothing better than finding a worm and getting to play with it, lol. Well, maybe that's just a southern country kid past time. Nevertheless, with our large crew we typically make quick work of shucking and silking hundreds of ears of corn.


All the husks and silks are brought to the compost pile to be worked back into the soil at a later date. I can't say it enough, everyone who has a garden should have a compost pile that they are continuously adding to so that you are able to add those vital nutrients back into your garden soil.


With our first two harvests of corn we managed to freeze 21 bags of corn on the cob, nearly reaching our goal with several more harvests to go. If you'd like to see how we preserve corn on the cob, check out this post.


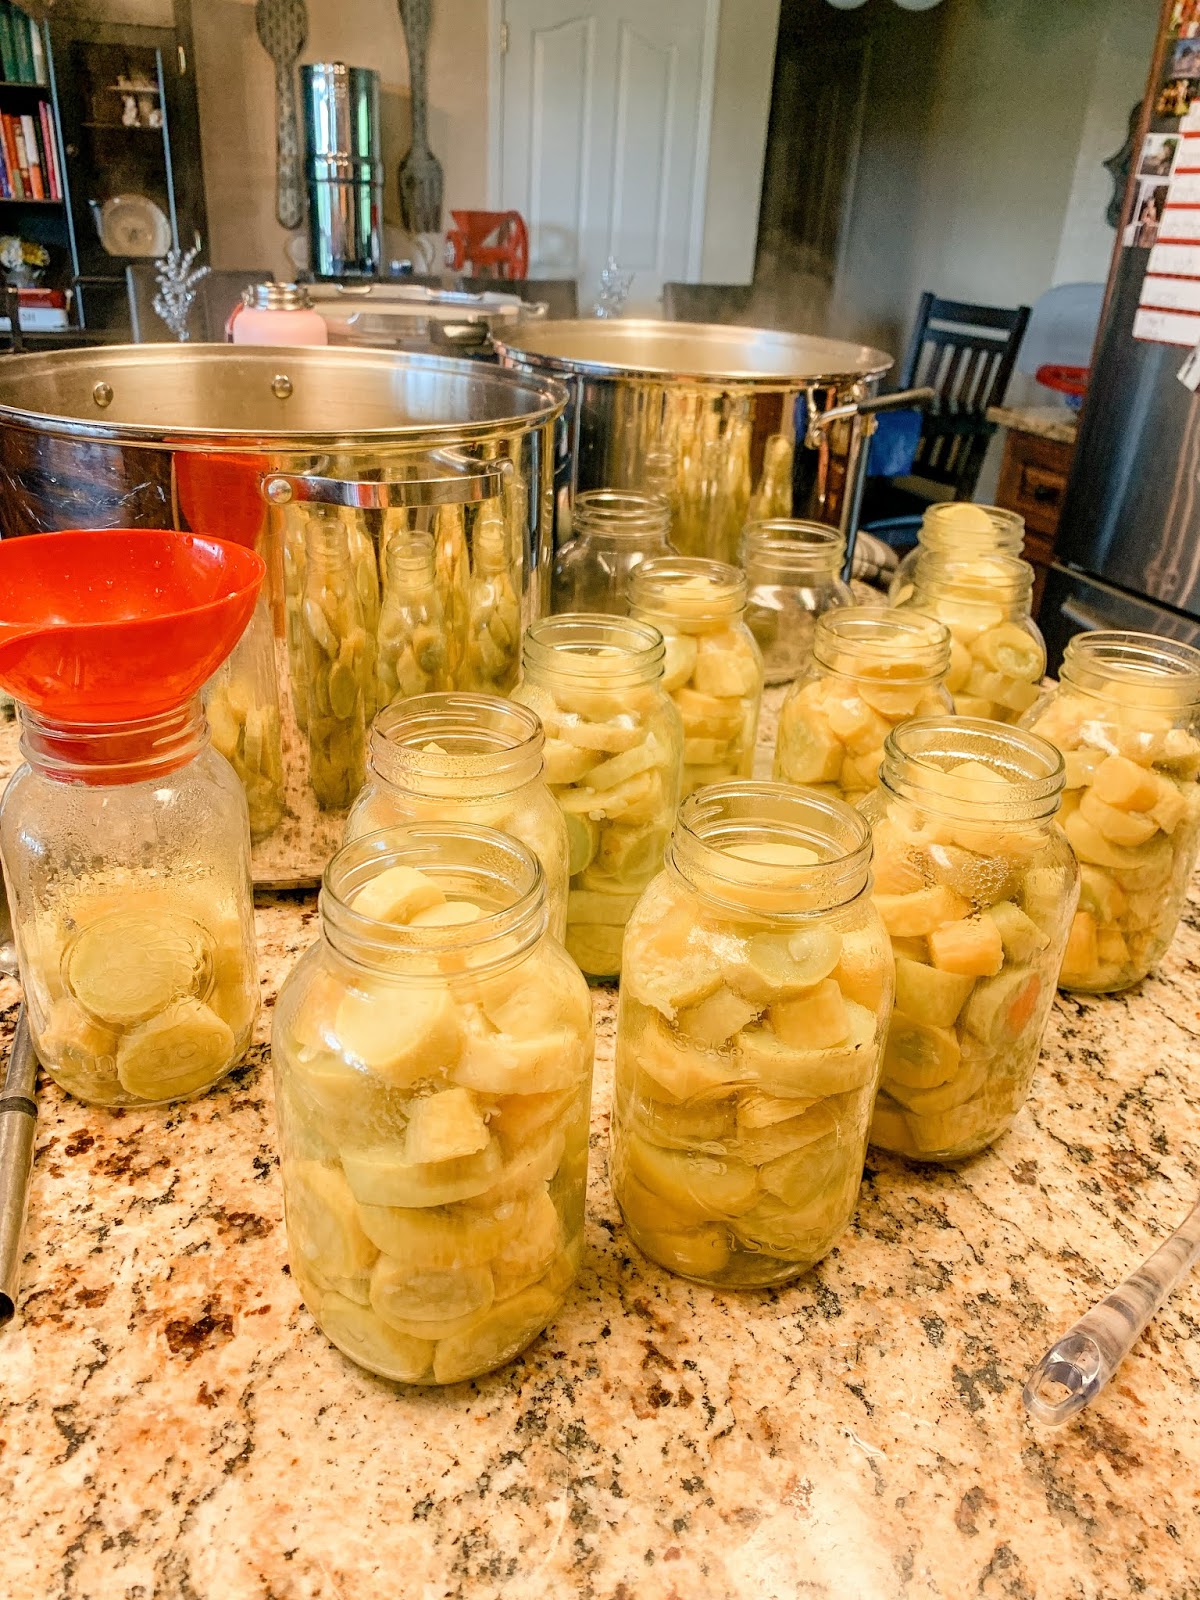
After the children were put to bed my husband and I had a late night date skinning corn to be canned. We had a friendly competition to see who could skin the most ears ~ I won't tell ya who won, lol. 


The corn looks so pretty. It may take a lot of work to get the corn harvested and ready to preserve, but it is so worth it. There is nothing like farm fresh corn. So much so that most of us had rather not eat corn if it isn't farm fresh. I guess we're just a tad bit spoiled, peaches and cream corn really is the cream of the crop and we are so blessed to be able to grow it.

I'm so grateful for such a bountiful harvest, while we may do a ton of work planting, weeding, harvesting, and preserving we know that it is God who is the giver. It is only through the Lord that we can do anything especially in regards to gardening and growing our own food. There have been so many times over the years that we have heavily relied on our garden to feed our family. And now with my husband losing his job it seems all the more important that we grow as much as possible. I have no doubt that God is going to provide for our family one way or the other. But, it definitely fills me with much hope when we're picking like we have been this year. God truly is amazing and will always meet our every need.

With Love & Hope,
Jennifer

Sunday, June 21, 2020

Homestead Hand-Me-Downs


Stretching our modest income and saving every penny possible is at the tippy top of our priority list when managing and running our household as well as our homestead. We are always on the look-out for bargains that will benefit our family. Many of those money-saving opportunities are often found through networking and connections we have made throughout life. While the internet can be a valuable resource, real life interactions often have huge benefits too. 


We always try to get the word out that we are gracious recipients of hand-me-downs or seconds. We don't require brand new or the best. Most of the time used or 'seconds' is just as good as anything we could buy new. We live in a culture that has forgotten the art of bartering and negotiating. We think the brand new store-bought, most expensive item is supreme, when in reality that's not always the case. Are there times to make quality investments? Absolutely, but all too often folks are quick to buy things they don't need  and are in turn quick to purge. Finding nearly new items that you are in need of can quite frequently be found through communicating your needs with acquaintances online or in person. 
 

The art of living debt free and on a limited budget begins with a complete new way of thinking regarding money. It is critical to reevaluate how, when, and where necessities are purchased. Of course one must first clearly define needs verses wants to truly pursue a simplified, back to basics, debt free lifestyle. I can assure you needs from the 'Word's' standpoint is hardly a need in the eyes of God. Seeking Christ and His wisdom regarding household and homestead expenditures should be at the core of our every-day lives. I'm often amazed how The Lord provides when I bring our needs to Him in earnest prayer. Sometimes He provides in miraculous provisions and other times it's in a readjustment of my thought process. Too many times when I think I need to purchase something The Lord shows me an item we already own can be used in lieu of what I wanted to buy. 

Last year we had decided to reign in our homesteading efforts and to just do the bare minimum, which meant we donated a couple hundred canning jars. When Covid-19 struck and my husband realized he was losing his job we decided to ramp up our homesteading efforts again. I was nervous we were not going to have enough jars for our needs. I shared my concerns with The Lord and it was barely a few weeks later when someone we know offered us 200 of their narrow mouth jars they were purging. When we picked the jars up they told us they may even have some more jars to donate to us! I don't know why I am always surprised when God provides, because honestly He has NEVER let our family down. I guess that's why I am not remotely worried about what will happen in our family's future ~ God will never forsake His people, always providing for our every need above and beyond anything we could ever imagine. 

The homesteading mindset is one of resourcefulness and contentment. Ultimately, learning to work with your hands and being content with what the Lord has given you. We're are a blessed nation and we have so many opportunities if we're just intentional to seek them out. Learning to look outside the box and engage with folks who are like-minded is the key to rebuilding communities filled with peace, love, and endless recourses. One connection at a time, we can be the positive change this World needs. I truly believe the Christian Homesteading community can be a valuable beacon of hope if only we accept the calling. 

With Love & Hope,
Jennifer

Thursday, June 18, 2020

Canning Green Beans


Our green beans are doing fairly well this year and we've managed to can 14 quarts. That may not seem like much, but it's part of 14 meals for our family, and every little bit helps. In a perfect world we would get at least 50 quarts of green beans, but it's been a few years since we've had a bumper crop of green beans like that. It's good to have goals though. For now we're eating fresh and canning the rest. It's best not to leave green bean in the fridge (or on the counter) too long, because they have a tendency to dry out. Which is why we're canning our green beans in such small batches. 


We have four rows that are about 50 feet long full of stringless bush green beans. We prefer the bush kind because the leaves keep the plant from drying out in the blazing Alabama sun. We do have to water them on occasion. Green beans are a finicky plant; they need a sufficient amount of water but not too much and they must not be planted too deep or too shallow (got to find that happy medium). If you can manage to do all of those things then it's likely you will have a bountiful harvest. 


Canning green beans is one of my most favorite foods to can. It is super easy and quick with minimal mess. If you're looking for a first time pressure canning crop, green beans is definitely the way to go. 

Once we have our green beans picked, we give them a good washing and dry them well, typically laying them on a beach towel to dry. Most often when we are canning green beans we snap the ends off the night before, place the beans in a large bowl with a towel on top of it (if you had a large bowl with a lid that would be fine too), and then we store them in the fridge until morning. When morning comes we're all set to put the green beans into jars and commence with the pressure canning process. 

Canning Green Beans 

  1. Bring a large pot of water to boil
  2. While water is coming to a boil stuff sanitized jars with green beans, filling to the neck of the jar
  3. Pour boiling water into jar, covering green beans, do not go past neck with the water
  4. Place lid and rim onto jar according to safe canning procedures
  5. Put jars inside pressure canner and process for 25 minutes at 10 pounds of pressure (reference canner instructions for specifics)
And that's it my friends, it doesn't get much easier than that when it comes to canning. This is one of those canning ops where it's fun to include even the little ones, because snapping green beans and filling jars is easy and fun, plus they're learning an amazing skill that they can use for a lifetime. Not to mention the awesome family bonding time to be had when preserving food. 

I honestly believe there is no greater platform for building and strengthening the bonds of a family than growing and preserving food together. The memories made, the lessons learned, it's all priceless if you ask me. But, then again I am just an old fashion woman with a heart for the simple life where God, family, and working hard together is the mantra of life. Perhaps I was just born in the wrong decade, and these ideals have long died away. Nevertheless, I plan to keep on keeping on doing my best to raise my children with these core values, and maybe one day it will be 'catching' with a new generation. Maybe then we can actually get back to living and dying the way God designed.

With Love & Hope,
Jennifer

Monday, June 15, 2020

Potato Harvest 2020


This past weekend we harvested our red potatoes. We planted our potato crop in early March. We normally plant them in late February, but the weather was terribly rainy and the ground was just too wet. If we had planted when the soil was too wet it would have tore up our garden and made it difficult for the potato plants to grow. Thankfully, even though we planted them later than usual, the harvest was still plentiful.


We planted our potatoes before the onset of these crazy times we find ourselves under now. If we had known then what we know now, we would have planted double what we did. But, we were donated our potato slips this year which means our harvest of potatoes was nearly free ~ praise be to God! Next year will be different and we will plan accordingly. 


We had planned to get down to the potato patch early in the morning to take up the potatoes, but my father-in-law surprised us and had pulled them all up before we could even get out there! Potatoes are ready to be picked when the leaves start to turn brown. We also must keep an eye out for ants, because they like to attack our potatoes before they're are fully ripe. When harvesting potatoes all you have to do is pull the green part straight up out of the ground and with it will come most if not all of the potatoes attached to that plant. 


Once we've pulled up all the potatoes and sort the greens from the actual potatoes, we run the plow through where the potatoes were planted to try to turn the soil. We do this, because sometimes there can be potatoes that didn't come up with the leafy part of the potato plant. The children's job is to walk behind the plow pushing the dirt mound back into the plow hole searching for potatoes. 


Once the potatoes are all accounted for, we take the green parts of the potato plants to the compost pile and then set the potatoes on a tarp to dry out for the remainder of the day. You don't want to leave the potatoes out over night because the dew will ruin them. Before nightfall, we collect the potatoes into buckets and bring them inside the house. Unfortunately, we do not have a cellar, so we have to process our potatoes fairly quickly. We set aside a nice size grocery store sack full of potatoes to eat fresh and then the remainder are canned. It's important to can the potatoes as quick as possible, because untreated, organically grown potatoes have a tendency to go soft fairly quickly.


We harvested about 20 gallons of potatoes this year, which was a mighty fine harvest if you ask me. I'll be sharing soon how we can our potatoes; but for now you can check out this post for an alternate way we've found to store our potatoes without processing them. This method will allow the potatoes to last a couple of months, which gives you the opportunity to enjoy farm fresh potatoes a tad bit longer even when you don't have a root cellar.

Under our family's current circumstances I've never been so glad to be able to grow our own food. There have been times over the years when I've resented the fact that we 'had' to grow our own food to make ends meet. But, now I find myself undeniably overwhelmed with gratitude that we know how to put food on the table without being dependent on going to the grocery store. While it is convenient to run to the local super market to buy food, it's a relief to know we don't have to if we didn't want to or couldn't. 

I'm a firm believer that everyone should at least have a kitchen garden. If the only planting space you have available is a patio, I can assure you there is plenty of produce that can be grown in pots and other forms of planters. There is no better time than now to learn the art of growing your own food. None of us have to be dependent on the grocery stores. We need to unite as a global community, encouraging, supporting, and sharing resources to help restore the food industry of the world. Our bodies need and deserve natural, unadulterated food grown by the hands of those who care. I have no doubt in my mind that we can pursue these endeavors with great success if only we commit to do it with out whole hearts and as if our lives depend upon, because truthfully dear friends, it does.

With Love & Hope,
Jennife

Friday, June 12, 2020

Blueberry Breakfast Skillet Cake


Easy meals that require simple ingredients that we readily have available are my favorite. We are blessed to be able to pick blueberries located on our neighbors property, and we often pick upwards of twelve gallons. Which means we have an abundance of blueberries throughout the year. One of my favorite ways to use our blueberry harvest is in Blueberry Breakfast Skillet Cake. 


We are currently under a no spend challenge. We purchased a one month supply worth of groceries and are being extremely intentional to use the food we have in our larder. During the Memorial Day weekend we had my extended family down for a visit. Making sure we had yummy food for our guests while keeping to our no spend challenge was of utmost importance to me. When I was planning my menu, I knew one of the meals we were going to make had to include my Blueberry Breakfast Skillet Cake, because it's cheap to make,  delicious and good for you.

We try to eat as healthy as possible within reason of keeping up with our modest budget. This recipe that I'm sharing today just so happens to be one of my many healthy recipes in my arsenal. When my family was visiting we paired the Blueberry Breakfast Skillet Cake with farm fresh scrambled eggs and my folks contributed two large packages of bacon (which is a rare treat for our family!). Y'all this was the best breakfast and everyone loved it ~ well almost everyone, lol ~ you just can't please them all, especially in a group of folks numbering over 20! 


Blueberry Breakfast Skillet Cake

Ingredients
2 cups whole wheat flour
1/2 cup honey
1 tsp sea salt
1 tsp baking powder
4 tbsp melted butter + 2 tbsp butter
2 eggs
1 cup milk
1 tsp vanilla
1 cup blueberries

Directions
Heat over to 350*. Place 2 tbsp butter in bottom of 10-inch cast iron skillet and put in the oven as it is heating up. Combine dry ingredients in a bowl, add wet ingredients and stir. Fold in blueberries. Carefully remove skillet from oven with oven mitt and pour batter into skillet. Place skillet back into oven and bake 25-30 minutes until cake is a rich brown and pulling away from edges. Turn cake out onto plate and cool.

For our large crew we doubled the recipe and made two cakes. They went fast y'all with hardly any leftovers. It's such a good feeling to be able to feed my family (and guests) good, healthy, homemade food. While this cake isn't designed to be eaten with an icing you could easily add a honey cream cheese icing or even a powdered sugar icing if you felt it needed a little something extra. This recipe for Blueberry Breakfast Skillet Cake isn't meant to be a rich cake, it's more like a subtle sweet. But, as is with any recipe, make it yours, fancy it up as you so desire ~ that is truly the essence of baking and cooking from scratch.

With Love & Hope,
Jennifer

Thursday, June 11, 2020

Perks of Raising Children in the Garden


Our family has been blessed to be able to raise our children in the garden. Does this mean we've spent every waking hour in the garden, not hardly; but we have spent a good many hours toiling in the soil. I never imagined in a million years that it would turn out to be as great a gift as it has turned out to be. In our early years, growing our own food was just something we felt led to do to save money and part of our 'back to basics' lifestyle. Our children really didn't have much of a choice but to come along side of us for better or worse ~ learning with us, as we evolved in our homesteading efforts.

Thankfully, we rarely have had any complaints from our children when it comes to working in the garden. To be honest, most of the time they are the spearheads when it comes to getting us all our there to get the work done. I suppose this has much to do with the fact that each of our children have spent their days digging in dirt since before they could walk. It's second nature, especially for the younger ones coming up. They've watched their Daddy, Mama, and siblings spend countless hours planting, hoeing, and picking the garden ~ year after year. They don't know anything else.

During seasons of burnout I've often thought about what our life would look like if we didn't have the demands of a thriving garden. When I ponder on the pros and cons of growing our own food, I really can't think of too many negatives. Any downside can quickly be turned into a positive. Which is why I quickly put those feeling aside when I have my rare: "I just don't want to do this anymore". Because I know raising our children in the garden is one of the best things we could ever do for them.

There are numerous advantageous to raising children in the garden, but in effort to keep this post to a minimum, I'm only going to share our family's top three reasons to include children in the process of growing your own food. 
  1. Knowledge & Confidence Builder: Nature is God's greatest classroom. There is no better learning platform than the family garden. For a child to know where food comes from is an asset in and of itself. We have found that when a child has a firm understanding as to what it takes to grow food that it reduces children becoming picky eaters. (Growing food is hard work!!) There are so many lessons to be had outside in the garden from how to plant, when to plant, what to plant, what are pests and plights for growing fruits and vegetables ~ the lessons are endless. Not to mention the confidence booster that comes from growing your own food. For a child to experience the first hand joy of planting a seed, weeding, watering, and picking the delicious delectable fruit or veggies ~ trust me y'all it's good stuff for their little hearts, minds, and souls.
  2. Encourage Parent/Child Relationship: Let's face it there are so many distractions these days which vie for our attention and our children's attention. When working in the garden those deterring plights seem to disappear; and it's just parent and child enjoying the beauty of God's creation. Can it be an opportunity for angst and child training? Absolutely, but that doesn't make children in the garden a bad thing. On the contrary! It makes it a good thing, a very good thing. To be able to teach your children to grow their own food is a valuable lifelong skill that they can take with them forever. They will never forget the time you invested in them teaching them, guiding them, and simply spending time with them. It truly is a worthwhile endeavor. 
  3. Physically Health: Our bodies need to be outside. We need to move, sweat, and get dirty. Working in the garden is hard physically work, there is no doubt. But, it's the good kind of work that has amazing rewards. Staying fit and healthy is at the core of growing your own food, and including children in those efforts only better insures that they will carry those valuable attributes with them in to adulthood. Sickness and disease breeds in sedentary bodies, true me y'all, working in the garden is anything but sedentary. Add in the amazing health benefits of dirt and the exposure to the sun and it's awesome source of vitamin D ~ working in the garden just doesn't get any better for promoting a healthy body and mind!


We are a family unit, a team, working together to meet the needs of the entire family. Just like any institution, no one member is any more important than the other ~ we need everyone participating to make this homestead run as productively and smoothly as possible. Our efforts to include our children in the garden is not to make them slaves, but to show them they truly are a valued members of the family. Giving them the assurance that no matter how young they are they still can help, they can serve others, and most importantly they can be a positive contributing member. After all isn't that the sum of what all parents are trying to do? Raise children who will be positive contributing members to society? If that is true, than I can assure you, there is no better place to raise children than in the garden.

With Love & Hope,
Jennifer

Tuesday, June 9, 2020

Canning Summer Squash


It's that time of year again where we are hot and heavy into the canning season. We have already canned over 100 jars for our larder!! This week we canned another 16 quarts of summer squash. While we are eating it fresh as quickly as it's coming in, there's still plenty left over that we do not want to ruin. Plus, one of our major goals with homesteading is to be able to enjoy our harvests throughout the year. Canning just so happens to be our favorite method for making sure that happens.


To kick off our squash canning session we washed the squash and cut them into large slices. Make sure that your slices are fairly large but not too large that they don't fit into the jars. Often times we do this the night before, leaving the bowls of squash on the counter and covering them with a towel. We try to accumulate at least a couple grocery store sacks full of squash before planning a canning day; since it does take a good bit of squash to fill a jar, and we want to make the most of our time.

Some people choose to freeze their summer squash. Because we have such a large producing garden we must be cautious on what we store in the freezer and what we can. Some produce just seems to fair better being canned and vice versa. For our family we just prefer the summer squash to be canned.


Canning squash requiers a pressure canner. Squash can be canned using the hot pack method or the raw method. We prefer the hot pack method for a couple of reasons. The first being that it seems to prolong the shelf life of our squash and hey we want our hard work to last as long as possible. Second, the hot pack method insures that each jar is filled with the most amount of squash as possible. Since summer squash has a high water content it tends to compress when cooked. By performing a quick boil the jars of squash have the opportunity to settle more than if they had been filled with raw squash ~ allowing for more squash in each jar. 


Canning Summer Squash

  1. Wash and slice squash
  2. Fill large pot 1/4 full with water and bring to a boil
  3. Add squash
  4. Bring back to a boil and boil for 3 minutes
  5. While squash is boiling fill another large pot with water and bring to a boil
  6. Remove pot of squash from stove and quickly fill quart jars with squash
  7. Take the other pot of boiling water and fill jars to neck
  8. Cap jars with lids and rim per safe canning procedures 
  9. Process in pressure canner according to manufacturers instructions for 40 minutes @ 10 pounds of pressure
Some words of caution when it comes to canning squash: Let squash sit in jars for a few minutes to settle, you may be able to add a few more pieces of squash. Once you cover the jars of squash with water let them sit again for a few minutes because you may be able to add more water to the jars. It's important to make sure the jars are filled to the neck, because when they are cooked in the pressure canner some of the water will evaporate. This does not effect the squash, but it does have the tendency to turn the squash brown. 

I know a lot of people get nervous when it comes to pressure canning, but once you learn safe handling practices it really is a breeze. I actually find that it can almost be easier to pressure can than water bath can because I'm usually only working with one produce item as opposed to multiple different ingredients,  i.e. spaghetti sauce in a water bath opposed to squash in a pressure canner. 

The key to getting comfortable with pressure canning is to simply to do it and keep doing it. There's no better teacher than having to do. Trust me if it weren't for the deep desire NOT to let our harvests of non-acidic foods go to waste I probably would have never learned to pressure can. I have no doubt in my mind that if I can learn to pressure can, anyone can learn to pressure can.

With Love & Hope
Jennifer

Friday, June 5, 2020

Easy Salad Jars


Eating healthy is a top priority of mine and I will go to great lengths to ensure that I am eating the foods my (as well as my family's) needs. It is my goal to eat as much produce as possible, but I must admit I am not a fan of chopping produce. Hence my obsession with salad jars and meal prepping. Anything to make my life simpler and as automated as possible is a win for me.

There was a time I was super big on 'once-a-month cooking', but that was when our family was half the size we currently are now. It's not exactly feasible to prepare a months worth of food for our size of family AND store all of our homegrown produce in our two deep freezers. Even though I can't meal prep all our food, I do try to do as much meal prepping as possible.

When it comes to making sure I'm eating my daily salads, I like to chop up all my produce and store them in canning jars (no preserving here, just storage). I then keep the jars in my fridge and pull from them throughout the week. Most of the produce will last 7-10 days, some will even last longer depending on the veggies/fruits moisture content. 

Chopping all my salad ingredients in advance saves me so much time and makes me actually want to eat a salad. Let's face it when you're in the throws of the daily grind, stopping to prepare a salad just isn't something most folks want to do. Trust me I get it, I'm in the same boat. But, if everything is already prepared, I'm typically thrilled to quickly toss together a salad with my pre-chopped produce. Plus a nice salad gives me that little boost of energy I'm often in need of come midday.

Not only do my salad jars encourage me to eat a salad everyday, but it also insures my produce lasts as long as possible. There's nothing more annoying than heading to the fridge to make a salad only to find all your produce is inedible. With the salad jars, the produce lasts a considerably amount longer than if it is just loosely setting in the fridge or out on the counter. 

I have seen where some folks make 'all-in-one' salad jars, but in my experience, combining all the produce into a single serve jar makes the salads go bad quicker.  My whole intentions in pre-chopping my produce is to reduce the time it takes me to prepare a salad each day throughout the week, prolong the shelf-life of my produce, and encourage me to eat more fruits and veggies. If the salads go bad quickly, obviously that would be counterproductive, which is why I keep the produce chopped in separate jars. After all, it only takes a few minutes to assemble my salads from the assorted jars.


Another bonus of these nifty little salad jars is how they help to keep the fridge clean an organized. It may just be our family, but produce often takes over our fridge, lol.

Summer is nearly here and many folks are already picking fresh garden veggies ~ these salad jars come in quite handy during this time of year. I just love the sight of fresh fruits and veggies. So colorful and inviting and not to mention the amazing way they make me feel when I eat them. These salad jars have definitely been a blessing to our family's  healthy lifestyle endeavors.

With Love & Hope,
Jennifer

Wednesday, June 3, 2020

Onion Harvest


This past weekend we pulled up and processed our onions. It was a quick little homestead event, even with us planting more onions than we have in a quite a few years. Thus meaning it was one of our biggest harvests of onions and for that I am super excited! It's always a blessing when your hard work is rewarded by a bountiful harvest. After all the more you grow the less you have to buy from the store ~ which is one of our biggest goals in having this little homestead. 


Harvesting onions is super easy. All you have to do is pull them straight up out of the ground! It's so easy, even our two year old got in on the action.


I'm sure it's just because it's early in the main summer gardening season, but everyone was overly happy to participate in harvesting the onions. Children are fairly similar to adults when it comes to being refreshed and recharged after a long winters rest ~ come August we'll all be struggling to keep the momentum along with the right attitude.


 Everyone got their hands dirty during our onion harvesting, which is probably why it went by so quickly. The saying "many hands make light work", is no truer than when harvesting and preserving the garden. I could barely take a few pictures and a couple videos before all the onions were picked, but, hey, I'm not complaining. The quicker we are able to get it done the quicker we can move on to the next area that needs attention on our homestead. Trust me the work is never done, no matter how hard we try to keep up.
  

Once the onions we were picked we had a crew inside washing and chopping the tops off as well as a crew outside doing the same.


We cut the tops off of the onions and discarded them into our compost pile. There's probably something fabulous you can make with them, but I've honestly never taken the time to research it.


We ended up with two large basins full of onions to process.


Once all the tops were cut off and the onions were washed, we set to processing them in our food processor. If you choose to use a food processor to chop your onions, it is important not to over process them or they will turn into mush. I prefer to just pulse them a few times and at that point they're usually the right consistency. Once they're all chopped we scoop them into freezer bags by the cup full. We place four cups of onions into each freezer bag, for the simple reason that my canning recipes typically measure in four cup increments. This way once canning season is in full swing all I have to do is pull the bags of onions from the freezer and they're already pre-measured to throw into my canning pots as needed.

Involving children in the start to finish process of growing your own food is a wonderful aspect of the homesteading movement. There are so many amazing skills to be learned on a working homestead. Life skills that can truly benefit children for years to come. When someone is taught where something comes from they obtain knowledge, but teach them how to do something and they have a priceless skillset. Knowledge combined with ability is a powerful asset that we all should be pursuing via as many avenues as possible. 

The homesteading life is an amazing platform to obtain an array of knowledge and skills. Which can in turn be passed down from generation to generation. (Sadly, many are on the cusp of extinction due to the progression of technology). There is priceless value in the art of heritage skills, growing your own food, and the family unit. I'm beyond grateful that I have had the opportunity to rekindle the homesteading skills of days gone by with my family. The memories we've made and the lessons we've learned have been more than a blessing; they've been a beacon of hope in this darkened world we find ourselves living in. As I've said time and time again ~ the back-to-basics lifestyle is not an easy life, but it is a good life. 

With Love & Hope,
Jennifer

Monday, June 1, 2020

DIY Art Display


Here is a super easy art display to showcase your kiddos beautiful crafts. We make a good many arts and crafts projects in our family and I wanted a designated place to display them. With our size of family they can take up a lot of space. With our awesome new art display, we can now enjoy them for quite a while or at least until we make new ones ~ plus the kiddos love seeing their work on the wall for everyone to see.


To make this project all you need is some 36 inch wooden dowels which we spray painted black, curtain clip rings, and cup hook screws. Of course I had to in my cute sign that my 13 year old son and I made a few weeks back.


First we hung up our sign where we wanted it, then we took the cup holder screws and screwed them into the wall. We placed them close enough to leave about two inches of extra hang off for the dowels on either side. We didn't make this an exact science type of DIY, although we probably should have, lol Before resting the dowels on the cup holder screws I slid five clip ring onto each dowel. 
  

We hung up one dowel under my sign in the center of our hallway above our coatrack and then two more at the end of our hallway. Since we have so many people who make crafts, I wanted to make sure there was enough space to hang a project for each person, should everyone participate on any one craft. 


Once we had the dowels secure and the clips in place I went to find some of our most recent projects to hang up on our new art display. I must admit I really love the way it turned out. I wish I had made it happen sooner than later, but now it's up and I have a feeling we'll enjoy it for many years to come. 

I have seen a similar art display online and the person used heavy duty Command Hooks to hold the dowels. We happen to have textured walls and the Command Hooks do not adhere to our walls, unfortunately. Honestly I think the cup holder screws are going to work just as well if not better to hold our dowels. I would hate to have created such a lovely space for it only to falling down. 

I know we live in a day and age where folks either swing from minimalism with nothing on their walls all the way to the other spectrum with perfectly prim and proper Pinterest wall decor ~ neither one of those is me. I'd rather have pictures my babies made all over my walls than stark nakedness or fancy wall hangings that I'd just have to dust, get board with it, or worry that one of my children might actually break it. At the end of the day we should all decorate with what makes us the most happy and for me that just so happens to be homemade crafts made by my most treasured people.

With Love & Hope,
Jennifer